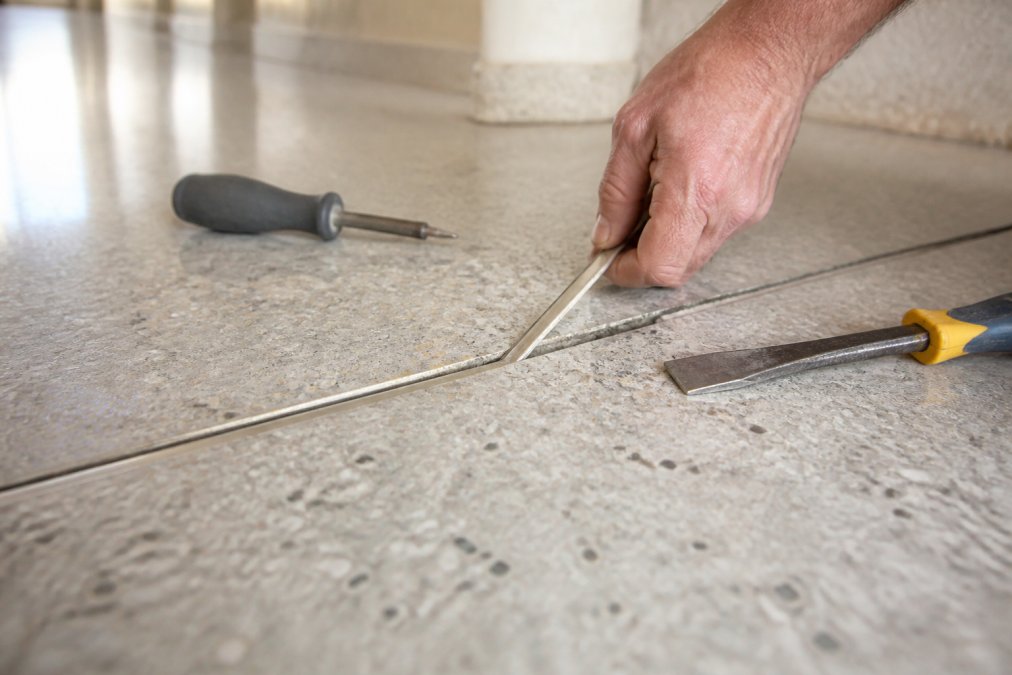
 how-to
Repairing Loose Terrazzo Divider Strips: A Step-by-Step Guide
Table of Contents
- Why Terrazzo Divider Strips Loosen and What Causes Failure
- Assessing the Damage: DIY vs. Professional Repair Thresholds
- Materials and Tools: Building Your Terrazzo Floor Repair Kit
- Step-by-Step Troubleshooting for Loose Strips
- Terrazzo Crack Repair Techniques for Surrounding Damage
- Professional Terrazzo Floor Polishing Services for Long-Term Protection
- Preventing Future Loosening: Maintenance and Expansion Joint Care
- Frequently Asked Questions
Last Updated: August 24, 2026
Why Terrazzo Divider Strips Loosen and What Causes Failure
Loose terrazzo divider strips are a common maintenance issue in commercial terrazzo flooring. These metal dividers, typically made of brass, zinc, or aluminum, control cracks by creating expansion joints and defining decorative patterns. When they fail, the floor's structural integrity and appearance suffer.
The primary cause is adhesive failure. Over time, the bonding agent degrades due to moisture infiltration, temperature fluctuations, and heavy foot traffic. In high-traffic environments like healthcare facilities and airports, constant stress accelerates this breakdown (peer-reviewed research).
Poor subfloor preparation is another critical factor. If the substrate wasn't properly leveled, cleaned, or sealed during installation, water seeps underneath the divider strip, breaking down the adhesive or terrazzo matrix.
Thermal expansion and contraction also play a significant role. If expansion joints aren't properly spaced or divider strips lack adequate clearance, the metal can't move freely, creating stress that eventually exceeds the adhesive's holding capacity.
Finally, incompatible materials cause hidden problems. Using the wrong adhesive type for your terrazzo system or selecting divider material that doesn't bond well with your aggregate blend leads to progressive failure.
Assessing the Damage: DIY vs. Professional Repair Thresholds
Not every loose terrazzo divider strip requires professional intervention, but getting the decision wrong can cause more damage than the original problem.
Start by assessing the extent of loosening. If the strip moves slightly under moderate hand pressure but shifts less than a quarter-inch, you're dealing with surface-level adhesive failure, typically DIY-friendly. If the strip rocks side-to-side, lifts noticeably, or has visible gaps around its perimeter, the problem is more serious and may involve subfloor damage requiring professional assessment.
Check the surrounding aggregate for cracks or spalling. If the terrazzo is cracked, crumbling, or losing pieces, the damage extends beyond the divider itself, indicating structural compromise that DIY repair won't address adequately.
Evaluate the size of the affected area. A single loose strip in a small space is manageable. If multiple strips are loose or the problem spans a large section, systemic issues like improper expansion joint spacing or widespread moisture damage demand professional diagnosis.
Consider your facility's requirements. Healthcare facilities require sterile, seamless flooring where gaps pose contamination and safety risks. Airports and high-traffic spaces need repairs that withstand intense daily use. Historic terrazzo requires specialized knowledge. Professional repair is the safer choice in these cases.
A1 Terrazzo recommends having a professional assess any significant loosening before attempting repair, a quick consultation clarifies whether you're looking at a weekend project or a job needing expert attention.
Materials and Tools: Building Your Terrazzo Floor Repair Kit
Successful repair depends entirely on using correct materials. The wrong adhesive can make the problem worse.
The foundation is the adhesive. You have two main options: resin-based adhesive for epoxy terrazzo systems and cementitious bonding agent for cementitious terrazzo. Identifying which system you have is critical. Using the wrong adhesive type is one of the most common mistakes in DIY terrazzo repair.
For surface preparation, you'll need a concrete grinder or angle grinder with a diamond cup wheel to remove old, failed adhesive down to bare subfloor. A wire brush and vacuum are essential for cleaning debris. You cannot skip this step, loose particles prevent new adhesive from bonding properly.
Leveling compounds are necessary if the subfloor has settled or developed low spots. A self-leveling cementitious compound works for most repairs.
The divider strip itself may need replacement if bent, corroded, or damaged. Brass strips are most common for aesthetic appeal and durability. Measure the existing strip carefully to order the correct replacement.
For re-anchoring, you'll need a trowel to apply adhesive evenly, a straightedge to check alignment, and shims or wedges to hold the strip level while adhesive cures. A rubber mallet helps tap the strip into position without damaging it.
Finally, invest in proper sealing materials. After adhesive cures, applying terrazzo sealer protects the repair and prevents moisture from re-entering the joint, extending repair life significantly.
Step-by-Step Troubleshooting for Loose Strips
Step 1: Inspect the Strip and Surrounding Aggregate
Begin by examining the loose divider strip without removing it. Press down on different points along its length to identify where looseness is most pronounced. Some strips fail uniformly; others have isolated weak points.
Look closely at gaps between the strip and surrounding terrazzo topping. Visible daylight indicates significant separation. Check for debris, dust, or old adhesive fragments in these gaps, they prevent new adhesive from making proper contact.
Inspect the aggregate immediately adjacent to the divider strip. Look for cracks radiating outward, which indicate stress concentration. Check for spalling or aggregate exposure suggesting the topping is deteriorating.
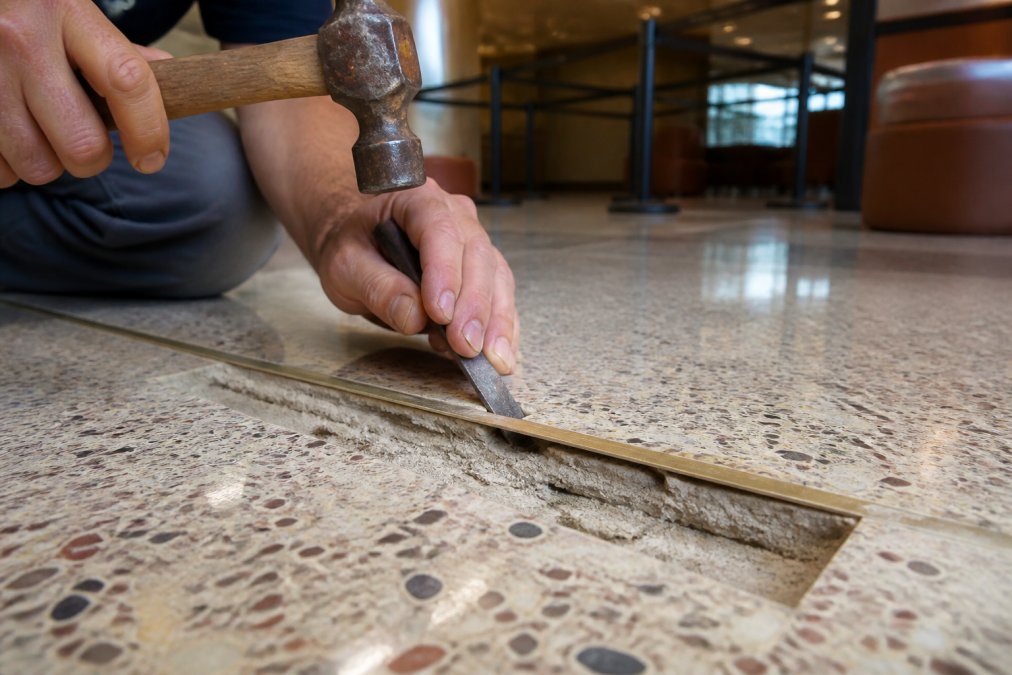
If the strip is severely bent or corroded, note whether it can be straightened or must be replaced. Measure the strip's width, height, and length for ordering a replacement if needed. Document the material, brass, zinc, or aluminum, because replacements must match the original.
Step 2: Clean and Prepare the Subfloor
Remove the loose strip carefully using a flat pry bar or chisel. Work slowly to avoid damaging surrounding terrazzo. Once free, use a concrete grinder or angle grinder with a diamond cup wheel to remove all old adhesive, grout, and bonding residue. Grind down to bare, solid concrete, any remnants of failed adhesive will cause the new bond to fail.
Vacuum thoroughly to remove all dust and debris. If the subfloor is wet or damp, allow it to dry completely or use a moisture barrier before proceeding. Many adhesive failures trace back to moisture trapped in the joint.
Inspect the subfloor for cracks, voids, or low spots. If you find significant damage, use a self-leveling cementitious compound to fill voids and level the surface. Allow it to cure fully, typically 24 hours, before applying adhesive.
Clean the underside of the divider strip itself. Remove any old adhesive, rust, or corrosion using a wire brush or light grinding.
Step 3: Select and Apply the Right Adhesive
You must use an adhesive compatible with your terrazzo system. For epoxy terrazzo, use a two-part epoxy adhesive designed for terrazzo installation (astm.org). For cementitious terrazzo, use a cementitious bonding agent or modified thin-set mortar formulated for terrazzo.
Mix the adhesive according to package directions. Consistency matters, too thick and it won't flow into gaps; too thin and it won't hold the strip firmly. Apply the adhesive to the back of the divider strip using a notched trowel, creating uniform ridges that will compress when the strip is pressed into place.
Apply a thin layer of adhesive directly to the cleaned subfloor as well. This double-coating technique ensures better contact and stronger bonding. Work quickly, as most terrazzo adhesives have limited open time.
Step 4: Re-anchor and Level the Strip
Position the divider strip carefully, pressing it down firmly into the adhesive. Use shims or wedges beneath it to hold it level while adhesive cures. A straightedge placed across the strip and surrounding terrazzo confirms proper alignment. The strip should be perfectly flush with the aggregate surface.
Tap the strip gently with a rubber mallet to seat it fully in the adhesive. Wipe away excess adhesive before it hardens. Allow the adhesive to cure fully, typically 24 to 48 hours, before removing shims or allowing foot traffic.
Once cured, check the bond by pressing on the strip from different angles. It should feel completely solid with no movement. If movement persists, the adhesive may not have cured properly or the subfloor may have additional issues requiring professional assessment.
Terrazzo Crack Repair Techniques for Surrounding Damage
When loose terrazzo divider strips fail, the surrounding topping often suffers collateral damage. Cracks radiating from the strip or aggregate spalling require repair to restore both structural integrity and appearance.
Small hairline cracks can be filled with color-matched epoxy or cementitious grout. Clean the crack thoroughly with a vacuum and compressed air. Apply the filler material using a putty knife, working it into the crack and leveling it flush with the surrounding surface.
Larger cracks or spalling require more involved repair. The damaged terrazzo must be removed carefully to create a clean, defined repair area. Use a concrete saw to cut straight lines defining the boundary, then remove damaged material using a concrete grinder or chisel. The resulting cavity should have clean, vertical sides for new terrazzo to bond securely.
The repair cavity must be thoroughly cleaned and the subfloor inspected for moisture or structural issues. Apply a bonding agent to cavity walls and subfloor, then fill with new terrazzo topping matched to your original floor's aggregate blend and color.
After the new terrazzo cures, the repair area requires grinding and polishing to blend seamlessly with the surrounding floor. Professional terrazzo floor polishing services ensure the repair matches the original floor's finish and appearance.
Professional Terrazzo Floor Polishing Services for Long-Term Protection
Once loose terrazzo divider strips are repaired and surrounding damage addressed, professional polishing protects your investment and extends the floor's lifespan. Polishing removes minor surface imperfections, exposes fresh aggregate, and applies protective sealing against future moisture damage.
The polishing process begins with grinding using progressively finer diamond abrasives. This removes the top layer of the terrazzo matrix, exposing the aggregate beneath and creating a smooth, even surface. Multiple passes with finer grits build the desired finish, from matte to satin to high-gloss.
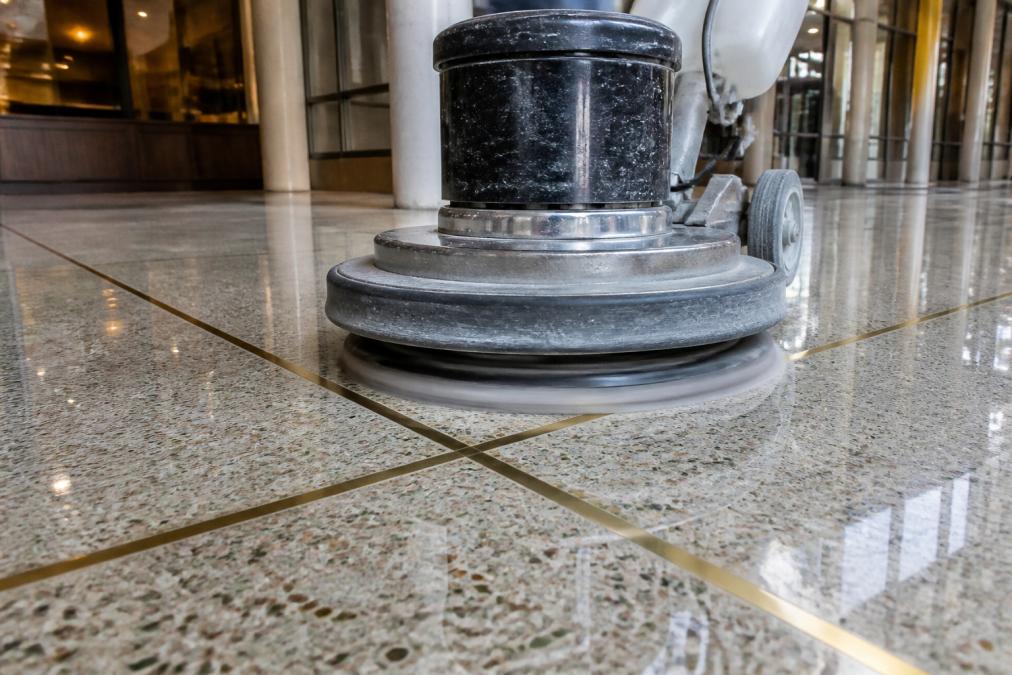
After polishing, a terrazzo sealer is applied to the entire floor, including newly repaired areas. This sealer penetrates the porous terrazzo surface and creates a barrier against moisture, staining, and future adhesive failure. Quality sealers last three to five years before requiring reapplication (peer-reviewed research).
A1 Terrazzo recommends professional polishing every two to three years for high-traffic commercial spaces. This preventive approach catches minor issues before they become expensive repairs and keeps your floor looking pristine. For healthcare facilities, airports, and other environments where appearance and durability are critical, professional maintenance is an investment that pays dividends.
The cost of professional polishing depends on the scope of work and specific requirements. Contact A1 Terrazzo for a quote.
Preventing Future Loosening: Maintenance and Expansion Joint Care
The best approach to loose terrazzo divider strips is prevention. Understanding how to maintain your floor and properly care for expansion joints keeps problems from developing.
Terrazzo floors expand and contract with temperature and humidity changes. Expansion joints must remain clear and unobstructed. Never caulk or fill expansion joints with grout or sealant. These joints need to move freely to accommodate the floor's natural expansion and contraction. Blocking them creates stress that eventually causes divider strips to loosen or terrazzo to crack.
Inspect expansion joints regularly for debris accumulation. Vacuum joints thoroughly and use compressed air to remove debris. If joints become clogged, use a soft wire brush to clean them gently without damaging the divider strips or surrounding terrazzo.
Keep the floor dry. Water is the primary enemy of adhesive bonds and the terrazzo matrix itself. Address any water leaks, seepage, or condensation issues immediately. In humid environments, use dehumidifiers to maintain reasonable moisture levels.
Use appropriate cleaning products. Acidic cleaners, harsh chemicals, and abrasive scrubbing damage the terrazzo surface and degrade sealers. A pH-neutral terrazzo cleaner and soft mop are all you need for routine maintenance.
Maintain the protective sealer. Test the sealer's effectiveness periodically by placing a drop of water on the floor. If it beads up, the sealer is intact. If it absorbs into the terrazzo, reapplication is needed. Regular resealing prevents moisture from reaching adhesive bonds and subfloor.
Loose terrazzo divider strips result from deferred maintenance, moisture problems, or installation shortcuts. The good news is that most repairs are straightforward if you understand the root cause and use the right materials and techniques.
A1 Terrazzo has spent 35 years perfecting terrazzo installation and repair across commercial facilities. Whether you're handling a single loose strip or planning comprehensive restoration, proper surface preparation, correct adhesive selection, and professional-grade finishing protect your investment. For facilities where durability and appearance are critical, healthcare centers, airports, schools, and historic buildings, professional assessment and repair ensure your terrazzo floor performs reliably for decades. Contact A1 Terrazzo to discuss your facility's terrazzo maintenance needs and learn how professional care extends your floor's lifespan while maintaining its beauty.
Frequently Asked Questions
Q: What causes loose terrazzo divider strips to fail?
A: Loose terrazzo divider strips typically fail due to poor subfloor preparation, moisture penetration, inadequate bonding agent application, or structural movement in the floor substrate. Over time, the epoxy matrix or cementitious terrazzo can shrink, and expansion joints may not accommodate seasonal floor movement. High-traffic areas and improper cleaning with water-based products can accelerate adhesive breakdown. Professional installation with proper surface restoration and the right adhesive selection prevents most failures.
Q: Can I repair loose terrazzo divider strips myself, or do I need a professional?
A: Small, isolated loose strips can be re-anchored as a DIY project if you have basic tools and follow proper surface preparation steps. However, if multiple strips are loose, the subfloor shows signs of moisture damage, or the aggregate blend around the strips is cracked, professional intervention is necessary. Professionals have access to specialized equipment, proper adhesives, and expertise in terrazzo crack repair techniques that ensure structural integrity and prevent future issues.
Q: What's included in a terrazzo floor repair kit?
A: A basic terrazzo floor repair kit should contain a resin-based adhesive or epoxy bonding agent suitable for your terrazzo system, a leveling compound for subfloor preparation, polishing pads or sandpaper for surface restoration, grout repair material, a chisel and hammer for strip removal, cleaning supplies, and safety equipment. For professional-grade work, you may also need a grinding tool for aggregate exposure and specialized sealant. Always verify that adhesives are compatible with your specific terrazzo topping material before purchasing.
Q: How do I prevent terrazzo divider strips from coming loose in the future?
A: Prevent loosening by maintaining proper expansion joint care, using only pH-neutral cleaning products recommended for terrazzo, avoiding excessive moisture and water pooling, and scheduling regular professional terrazzo floor polishing services. Ensure your facility manager understands that high-traffic areas require more frequent maintenance. Professional installation with correct subfloor preparation, proper aggregate exposure, and appropriate adhesive selection are the foundation of long-term durability. Annual inspections can catch early signs of strip movement before failure occurs.
This article was written using GrandRanker
Frequently Asked Questions
Q: What causes loose terrazzo divider strips to fail?
A: Loose terrazzo divider strips typically fail due to poor subfloor preparation, moisture penetration, inadequate bonding agent application, or structural movement in the floor substrate. Over time, the epoxy matrix or cementitious terrazzo can shrink, and expansion joints may not accommodate seasonal floor movement. High-traffic areas and improper cleaning with water-based products can accelerate adhesive breakdown. Professional installation with proper surface restoration and the right adhesive selection prevents most failures.
Q: Can I repair loose terrazzo divider strips myself, or do I need a professional?
A: Small, isolated loose strips can be re-anchored as a DIY project if you have basic tools and follow proper surface preparation steps. However, if multiple strips are loose, the subfloor shows signs of moisture damage, or the aggregate blend around the strips is cracked, professional intervention is necessary. Professionals have access to specialized equipment, proper adhesives, and expertise in terrazzo crack repair techniques that ensure structural integrity and prevent future issues.
Q: What's included in a terrazzo floor repair kit?
A: A basic terrazzo floor repair kit should contain a resin-based adhesive or epoxy bonding agent suitable for your terrazzo system, a leveling compound for subfloor preparation, polishing pads or sandpaper for surface restoration, grout repair material, a chisel and hammer for strip removal, cleaning supplies, and safety equipment. For professional-grade work, you may also need a grinding tool for aggregate exposure and specialized sealant. Always verify that adhesives are compatible with your specific terrazzo topping material before purchasing.
Q: How do I prevent terrazzo divider strips from coming loose in the future?
A: Prevent loosening by maintaining proper expansion joint care, using only pH-neutral cleaning products recommended for terrazzo, avoiding excessive moisture and water pooling, and scheduling regular professional terrazzo floor polishing services. Ensure your facility manager understands that high-traffic areas require more frequent maintenance. Professional installation with correct subfloor preparation, proper aggregate exposure, and appropriate adhesive selection are the foundation of long-term durability. Annual inspections can catch early signs of strip movement before failure occurs.