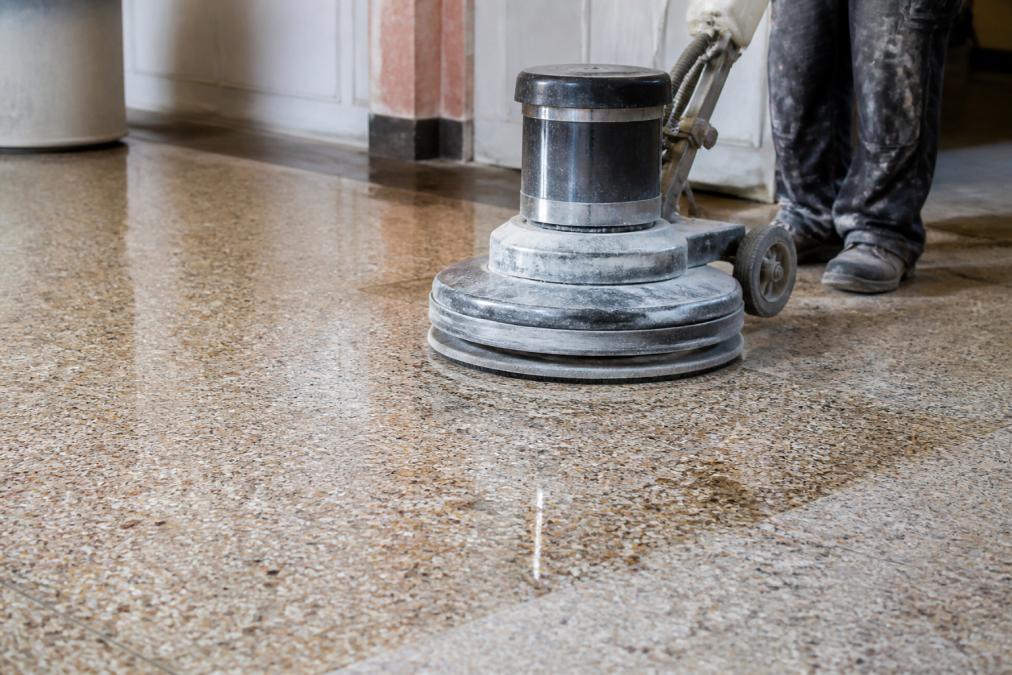
 how-to
Restoring Historic Commercial Terrazzo Flooring: A Step-by-Step Guide
Table of Contents
- What You'll Need Before Starting
- Assessing Your Historic Terrazzo Floor's Condition
- Removing Old Coatings and Adhesives
- Surface Preparation and Subfloor Inspection
- Terrazzo Crack Repair Techniques and Pitting Restoration
- Diamond Grinding and Terrazzo Polishing Equipment Selection
- Historic Building Floor Preservation Standards and Final Sealing
- Common Restoration Failures and Troubleshooting
- Frequently Asked Questions
Last Updated: August 16, 2026
What You'll Need Before Starting
Restoring historic commercial terrazzo flooring requires specific tools and materials designed for this venerable surface. Gather diamond grinding equipment, polishing pads in progressively finer grits, epoxy resin or cementitious binder for crack repair, color-matching aggregate and marble chips, penetrating sealer, and specialized cleaning solutions. You'll also need a floor stripper for removing old wax and coatings, pressure washing equipment, and protective gear including respirators, safety glasses, and gloves rated for chemical exposure.
For commercial terrazzo in healthcare facilities, airports, or government buildings, material selection carries regulatory weight. Water-based and low-VOC products have become standard in institutional settings where air quality matters to occupants and regulators alike.
Facility managers often underestimate the importance of substrate inspection tools. A moisture meter, straightedge for checking flatness, and borescope for examining subfloor condition prevent costly mid-project discoveries.
Assessing Your Historic Terrazzo Floor's Condition
Understanding what you're working with separates successful restorations from expensive failures. Begin with a comprehensive visual inspection. Look for hairline cracks, pitting, and areas where the monolithic surface has separated from the subfloor. Tap the floor with a small hammer; hollow sounds indicate delamination, while solid sounds suggest intact bonding.
Check for moisture immediately. Even if the floor looks dry, moisture trapped beneath the surface causes expansion, cracking, and failed repairs. Use a moisture meter on the subfloor and in the concrete itself. Many historic buildings have moisture management issues that were never properly addressed. This is the single most common reason terrazzo restorations fail within the first year.
Document the terrazzo's composition. Historic terrazzo typically uses marble chips, granite, or glass in a cementitious binder. The binder color influences your repair strategy. Mismatched repairs stand out immediately and undermine the historic character you're preserving.
Photograph the floor in natural and artificial light. These photos become your reference for color matching and document the condition before work begins, protecting you if disputes arise later.
Removing Old Coatings and Adhesives
Old wax, acrylic finishes, and adhesive residue block the terrazzo's ability to accept new sealers and repairs. Chemical strippers designed for terrazzo are your primary tool. Avoid generic floor strippers; specify products formulated for marble and terrazzo surfaces, preferably water-based or low-VOC.
Apply the stripper according to manufacturer instructions, typically allowing 15-30 minutes of dwell time. Use soft-bristle brushes or plastic scrapers; metal tools gouge the terrazzo surface. Work in sections, removing one area completely before moving to the next.
Pressure washing removes stripper residue and loosened coatings. Use moderate pressure (1,500-2,000 PSI) to avoid damaging the surface or forcing water into cracks. Allow the floor to dry completely, 48-72 hours in normal conditions, longer in humid climates. Rushing this drying period traps moisture and causes later failures.
Some historic floors have adhesive from previous tile or carpet installations. Mechanical removal using a floor scraper or light grinding may be necessary. Gentle, methodical removal takes longer but preserves the floor beneath.
Surface Preparation and Subfloor Inspection
The subfloor determines everything. A terrazzo floor is only as durable as what lies beneath it.
Before any grinding or polishing begins, inspect the subfloor thoroughly. Concrete must be clean, dry, and properly cured. Check for moisture intrusion from below, structural cracks, settlement or deflection, and incompatible substrates.
For commercial terrazzo in healthcare facilities or airports, subfloor flatness is non-negotiable. The floor should not deviate more than 1/8 inch over 10 feet. Uneven substrates cause stress concentration, premature cracking, and maintenance headaches.
If the subfloor fails inspection, document why repairs won't hold and reset client expectations. Transparency here protects everyone.
For sand-cushion installations (common in older buildings), verify the sand layer is intact and hasn't migrated. Some restorations require removing and replacing the sand-cushion layer entirely, a labor-intensive process that must be budgeted separately.
Terrazzo Crack Repair Techniques and Pitting Restoration
Cracks and pitting define most terrazzo restoration projects. The repair technique determines whether fixes blend seamlessly or stand out as obvious patches.
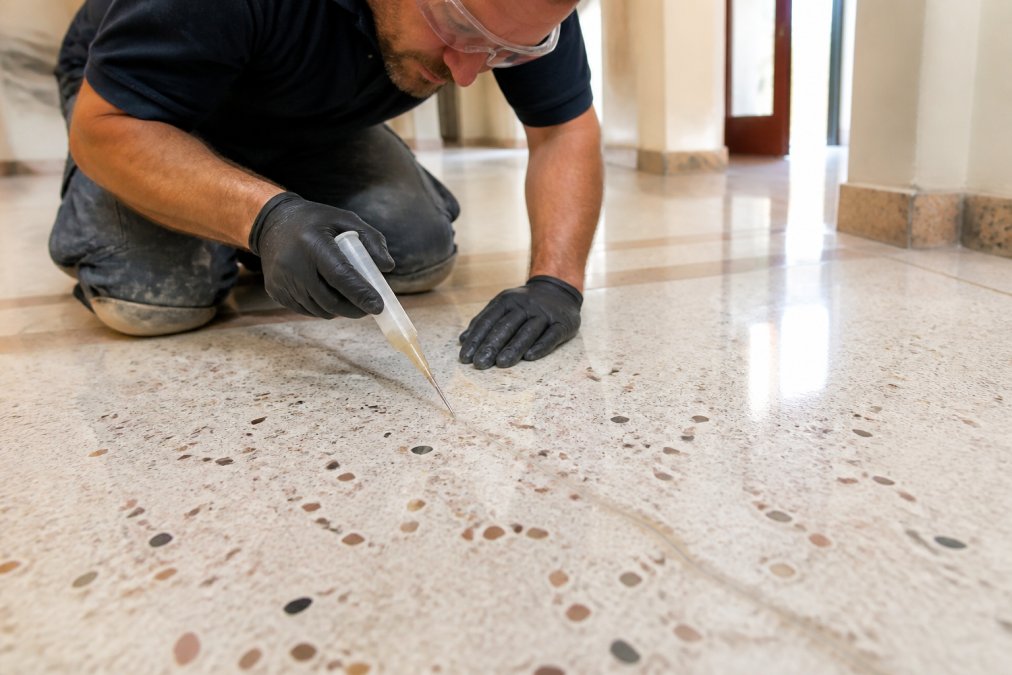
For hairline cracks (under 1/16 inch), inject low-viscosity epoxy resin using a caulking gun or injection system. The epoxy flows into the crack, bonds the separated terrazzo, and hardens to match the surrounding surface.
Wider cracks (1/16 inch to 1/4 inch) require routing and filling. Use a diamond-tipped router to create a clean V-groove along the crack. Clean out all dust and debris with a shop vacuum equipped with HEPA filtration. Apply epoxy or cementitious filler, overfill slightly, and allow to cure fully before grinding flush.
Color matching is where most repairs fail visually. The terrazzo's binder color, aggregate size, and stone composition must match the original. Historic preservation standards require matching the original terrazzo composition as closely as possible. This often means custom-mixing epoxy with marble dust and aggregate salvaged from the same stone lot if available.
Pitting requires a different approach. Deep pitting must be repaired by grinding out the damaged area to a consistent depth, then filling with epoxy or cementitious material. Shallow pitting can sometimes be left as-is if it's not causing structural concerns.
For historic building floor preservation standards, document all repairs photographically. Many jurisdictions require approval before restoration work begins, and documentation proves compliance with agreed-upon standards.
Diamond Grinding and Terrazzo Polishing Equipment Selection
The equipment you choose determines the quality of the finished surface and the timeline for completion.
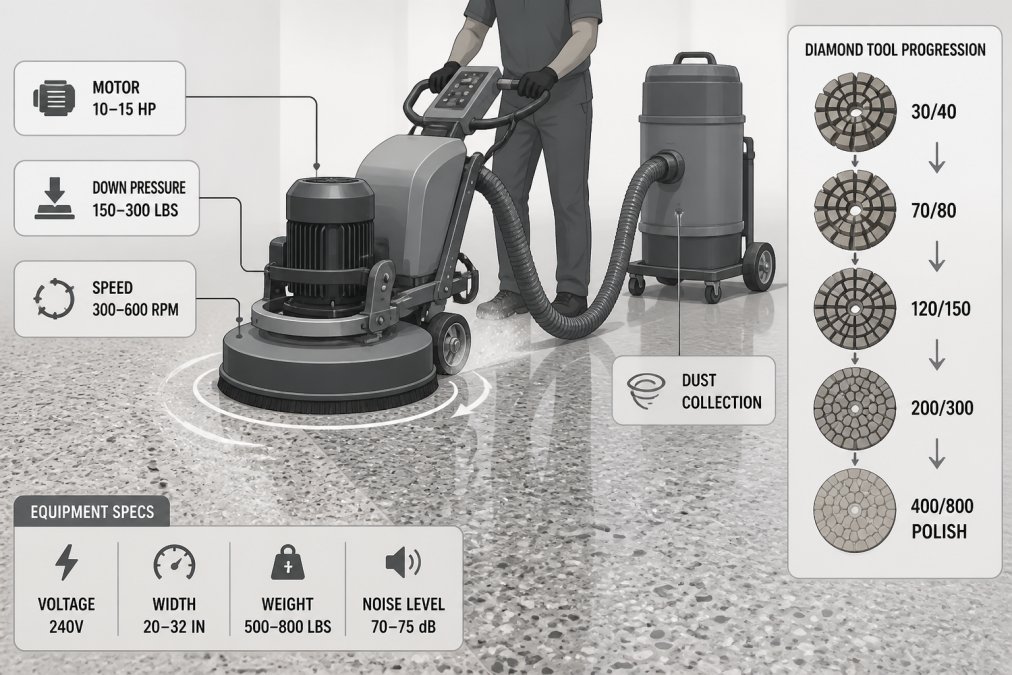
Diamond grinding equipment comes in two primary categories: single-head grinders and multi-head systems. Single-head grinders are more maneuverable for smaller areas or complex layouts. Multi-head systems (typically 3-5 heads) cover larger areas faster and produce more uniform results, ideal for expansive commercial floors.
The grit sequence determines final surface quality. Start with coarse grits (30-40) to remove old sealers and surface irregularities. Progress through medium grits (80-120) to eliminate scratches from coarser grits. Finish with fine grits (200-400) to achieve the desired polish level. Many historic terrazzo restorations use a honing finish (matte appearance) rather than high-polish, as this better reflects the original aesthetic.
Water management is critical during grinding and polishing. Wet grinding reduces dust, cools the surface, and improves appearance. Use a dust collection system with HEPA filtration, essential in occupied buildings.
Professional-grade equipment ensures consistent results. Quality equipment pays for itself through faster completion and superior surface quality.
Historic Building Floor Preservation Standards and Final Sealing
Sealing protects your restoration investment and determines long-term durability. Two primary sealer categories exist: penetrating sealers and surface sealers. Penetrating sealers absorb into the terrazzo, providing protection without altering appearance. They're ideal for historic preservation. Surface sealers sit on top, creating a protective layer but potentially changing the floor's appearance.
For healthcare facilities, airports, and government buildings, low-VOC penetrating sealers have become standard. These products meet indoor air quality standards while protecting the terrazzo from moisture, staining, and wear. Application typically requires two coats, with drying time between applications.
Historic preservation standards vary by jurisdiction. Research your local historic district guidelines or contact your state historic preservation office. In humid climates, moisture management is essential; preservation standards often allow or require sealing to prevent moisture damage.
After sealing, the floor needs a curing period before returning to service. Most penetrating sealers require 24-48 hours before light foot traffic and 7 days before full use. Protect the floor from moisture, dust, and traffic during this period.
Maintenance sealing extends the life of your restoration. A single sealer application lasts 3-5 years depending on traffic and cleaning protocols. Plan for periodic resealing as part of long-term maintenance strategy.
Common Restoration Failures and Troubleshooting
Understanding what goes wrong prevents repeating mistakes.
Cracking reappears after repair. The underlying cause is usually moisture or structural movement in the subfloor. Address the root cause before attempting repairs again.
Repairs don't match the original color. Most epoxy products cure darker than they appear wet. Color matching requires samples cured under the same conditions as the repair. Test batches on inconspicuous areas first.
The polished surface is uneven or has visible scratches. This indicates skipped grit stages or inconsistent grinding pressure. Return to a coarser grit and repeat the sequence carefully.
The sealed floor becomes slippery. Surface sealers can create slip hazards in healthcare or airport settings. Use penetrating sealers instead, or specify anti-slip additives in surface sealers.
Moisture problems persist after restoration. Sealing the terrazzo doesn't solve moisture problems; it only delays them. Proper moisture remediation requires addressing the source.
For commercial terrazzo in institutional settings, hiring experienced contractors protects your investment and ensures compliance with preservation standards.
Restoring historic commercial terrazzo flooring preserves architectural character while delivering durable surfaces for high-traffic environments. The process demands attention to detail, proper sequencing, and respect for original materials. Whether you're managing a university campus renovation, hospital facility upgrade, or courthouse restoration, the principles remain consistent: assess thoroughly, address moisture, repair properly, grind and polish methodically, and seal appropriately.
A1 Terrazzo brings 35 years of experience restoring commercial terrazzo in healthcare facilities, airports, government buildings, and historic properties across Florida. Our team understands the technical requirements of institutional settings and the preservation standards that govern historic restorations. We handle substrate preparation, crack repair, diamond grinding, polishing, and sealing with the precision these projects demand. Contact A1 Terrazzo to discuss your restoration project and learn how professional expertise protects your investment.
Frequently Asked Questions
Can old terrazzo be refinished to its original luster?
Yes. Historic terrazzo floors can be refinished through a multi-step process involving stripping old sealers, diamond grinding through multiple grit sequences, and polishing to restore the aggregate and marble chips beneath. The key is proper surface preparation and using the correct grit progression, typically starting with coarser grits and moving to finer ones. Most floors respond well to refinishing if the subfloor is structurally sound and cracks have been repaired beforehand.
What are the best practices for repairing cracks in historic terrazzo?
Hairline cracks should be cleaned thoroughly, then filled with epoxy resin or a cementitious binder matched to your terrazzo's color and composition. For larger cracks, routing and filling with a bonding agent ensures the repair won't separate. After repair, the area must be ground flush and polished to blend with the surrounding floor. Proper subfloor preparation prevents future cracking by addressing moisture issues and ensuring stable substrate support.
Is it necessary to use a professional for historic terrazzo restoration?
For historic buildings where architectural integrity matters, professional restoration is strongly recommended. Improper grinding can damage divider strips, incorrect sealer application can trap moisture, and wrong cleaning products can permanently stain the floor. Professionals understand historic building floor preservation standards and have specialized terrazzo polishing equipment. However, basic maintenance and minor chip repairs can be handled with proper guidance and products.
How do you maintain restored terrazzo in high-traffic commercial areas?
Use pH-neutral cleaners and avoid acidic products that etch the surface. Dust mop daily and damp mop with appropriate terrazzo-safe solutions weekly. Apply penetrating sealer every 1-3 years depending on traffic. In hospitals, airports, and schools, regular maintenance prevents staining and extends the floor's lifespan. Strip and reseal every 3-5 years to maintain appearance and protect the monolithic surface.
This article was written using GrandRanker
Frequently Asked Questions
Can old terrazzo be refinished to its original luster?
Yes. Historic terrazzo floors can be refinished through a multi-step process involving stripping old sealers, diamond grinding through multiple grit sequences, and polishing to restore the aggregate and marble chips beneath. The key is proper surface preparation and using the correct grit progression—typically starting with coarser grits and moving to finer ones. Most floors respond well to refinishing if the subfloor is structurally sound and cracks have been repaired beforehand.
What are the best practices for repairing cracks in historic terrazzo?
Hairline cracks should be cleaned thoroughly, then filled with epoxy resin or a cementitious binder matched to your terrazzo's color and composition. For larger cracks, routing and filling with a bonding agent ensures the repair won't separate. After repair, the area must be ground flush and polished to blend with the surrounding floor. Proper subfloor preparation prevents future cracking by addressing moisture issues and ensuring stable substrate support.
Is it necessary to use a professional for historic terrazzo restoration?
For historic buildings where architectural integrity matters, professional restoration is strongly recommended. Improper grinding can damage divider strips, incorrect sealer application can trap moisture, and wrong cleaning products can permanently stain the floor. Professionals understand historic building floor preservation standards and have specialized terrazzo polishing equipment. However, basic maintenance and minor chip repairs can be handled with proper guidance and products.
How do you maintain restored terrazzo in high-traffic commercial areas?
Use pH-neutral cleaners and avoid acidic products that etch the surface. Dust mop daily and damp mop with appropriate terrazzo-safe solutions weekly. Apply penetrating sealer every 1-3 years depending on traffic. In hospitals, airports, and schools, regular maintenance prevents staining and extends the floor's lifespan. Strip and reseal every 3-5 years to maintain appearance and protect the monolithic surface.