 ultimate-guide
Terrazzo Floor Moisture Barrier Installation Guide
Table of Contents
- Why Moisture Barriers Matter for Terrazzo Flooring
- Terrazzo Floor Moisture Testing Methods
- Substrate Preparation and Contamination Testing
- ASTM F3010 Moisture Barrier Standards
- Epoxy Moisture Barrier Application Process
- Moisture Barrier Options: Vapor Barriers vs. Resinous Membranes
- Signs of Moisture Barrier Failure and Prevention
- Flooring Compatibility and Installation Requirements
- Frequently Asked Questions
Last Updated: September 2, 2026
Why Moisture Barriers Matter for Terrazzo Flooring
Moisture is the silent killer of terrazzo installations. A1 Terrazzo has spent 35 years watching beautiful terrazzo floors fail not because of poor craftsmanship, but because moisture migrated from the substrate and compromised the bond between the terrazzo and the concrete slab below. When water vapor rises through concrete, it attacks the adhesive, weakens the terrazzo surface, and creates conditions for spalling, cracking, and complete floor failure within months.
Without proper moisture mitigation, you're gambling with expensive flooring in high-traffic commercial spaces, hospitals, airports, schools, and government buildings where downtime is costly and sanitation demands are unforgiving. This guide walks you through substrate testing, barrier selection, and correct application to prevent costly failures.
Terrazzo Floor Moisture Testing Methods
Before installing any moisture barrier, you must know what you're dealing with. Testing the concrete substrate reveals whether moisture levels exceed acceptable thresholds for terrazzo installation.
Calcium Chloride Testing
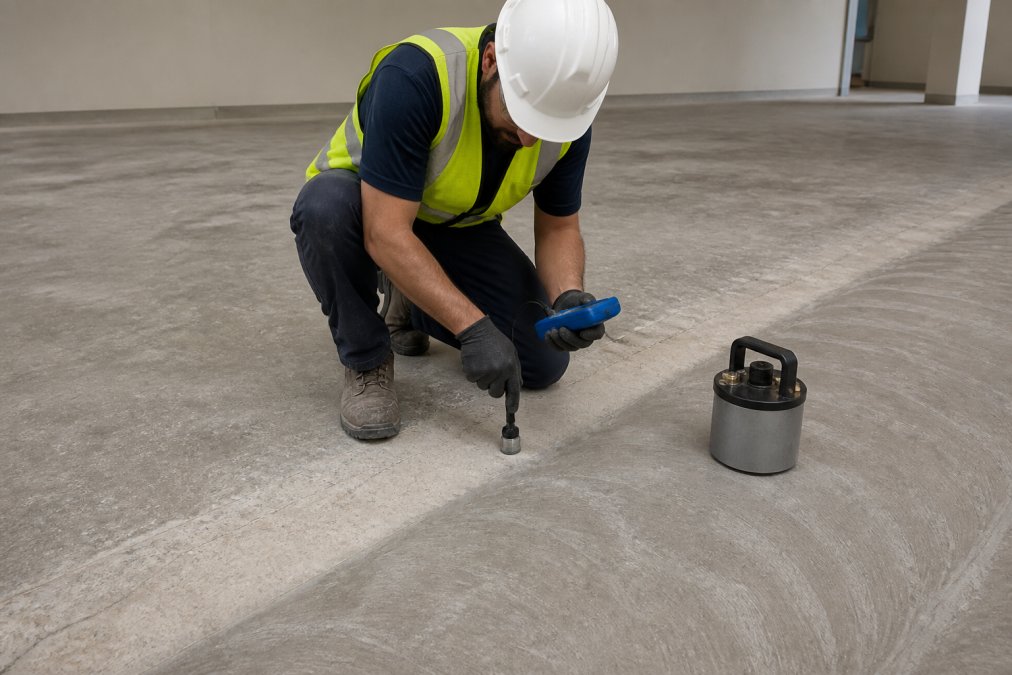
The calcium chloride test measures the rate of moisture vapor emission from the concrete surface over 24 hours, giving you a moisture vapor emission rate (MVER) reading in pounds per 1,000 square feet per 24 hours. A sealed calcium chloride pellet is placed on the concrete surface under a dome. After 24 hours, the pellet is weighed again; the difference reveals moisture being released. Most terrazzo adhesives require an MVER reading below 3 pounds per 1,000 square feet per 24 hours for proper bonding.
The advantage is simplicity and cost. The disadvantage is that it only tests the surface layer and can miss deeper moisture problems. Many contractors place multiple tests across large slabs to get a representative sample.
In Situ Humidity Probes
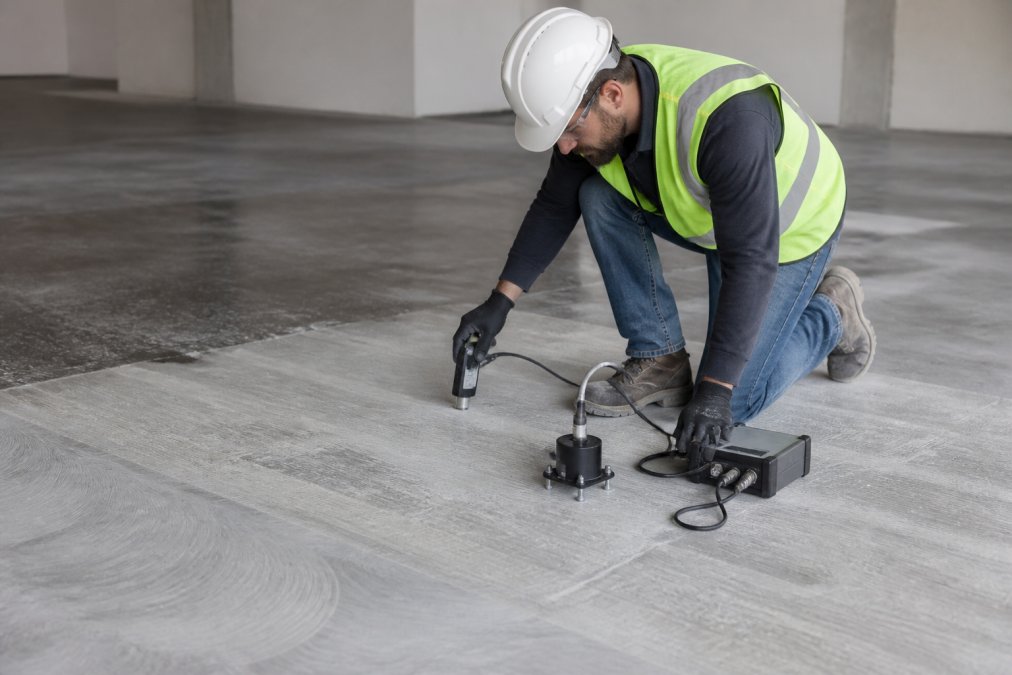
In situ relative humidity probes measure the moisture environment inside the concrete itself. These probes are inserted at specific depths and left for several days to equilibrate, providing a reading of relative humidity within the concrete matrix.
This method is more accurate for predicting long-term moisture behavior but requires drilling into the concrete, takes longer (typically 3-7 days for equilibration), and costs more per test. ASTM F2170 governs in situ testing and requires probes placed at 40% of the concrete slab depth (astm.org). For critical installations in healthcare facilities, in situ testing provides confidence that surface testing alone cannot.
Substrate Preparation and Contamination Testing
The concrete substrate is only as good as its surface. Contaminants on the concrete, dust, curing compounds, laitance, sealers, or old adhesive residue, will prevent the barrier from bonding properly. A moisture barrier that doesn't bond is a moisture barrier that fails.
Diamond grinding is the standard method for substrate preparation in commercial terrazzo work. A grinding machine with diamond abrasive pads removes the top layer of concrete, eliminating contaminants, laitance, and old adhesive in one pass while opening the concrete's pores to help the moisture barrier adhere properly. Grinding typically removes 1/8 to 1/4 inch of concrete surface (astm.org).
After grinding, test for contamination by applying a sample of your chosen epoxy or bonding agent to a small area and checking whether it pulls away cleanly. If the adhesive fails to bond, more grinding or cleaning is needed. Also test for alkalinity; if pH exceeds 8.5, a light acid etch or additional grinding may be necessary.
ASTM F3010 Moisture Barrier Standards
ASTM F3010 is the standard specification for moisture barriers used in flooring installations. It establishes performance requirements, application methods, and testing protocols that ensure the barrier will protect the flooring.
ASTM F3010 classifies moisture barriers into two main categories: vapor barriers (thin films that block moisture transmission) and resinous membranes (thicker epoxy or polyurethane coatings that block moisture and provide a bonding layer for terrazzo adhesive).
The standard requires that moisture barriers meet specific permeance ratings, how much moisture vapor can pass through over time. Lower permeance is better. ASTM F3010 also specifies that the barrier must be applied to a clean, properly prepared substrate and must cure fully before terrazzo adhesive is applied. Critically, the moisture barrier must be compatible with the flooring adhesive you're using. Confirm that the manufacturer has tested the combination and verified compatibility.
Epoxy Moisture Barrier Application Process
Applying an epoxy moisture barrier demands precision in execution. The wrong application technique, too thin coverage, or improper curing defeats the entire purpose.
Surface Preparation and Grinding
After diamond grinding, the floor is vacuumed thoroughly to remove all dust. Many contractors follow vacuuming with a damp mop to capture fine particles. The concrete is then allowed to dry completely, typically 24 hours in normal conditions, though humidity and temperature affect drying time.
Some moisture barriers require a primer to improve adhesion to the concrete. If your epoxy manufacturer specifies a primer, apply it according to their instructions. Primer typically dries in 4-8 hours and must be fully cured before the epoxy barrier is applied. backer rod installation.
Epoxy Application and Curing
Epoxy resinous membranes are mixed from two components: resin and hardener. Mixing must be thorough and precise; improper mixing results in soft spots that won't cure properly. Once mixed, the epoxy has a limited pot life, typically 30-60 minutes depending on the product and ambient temperature.
Application is done with a roller or squeegee, working in small sections to ensure even coverage. The epoxy should be applied at the thickness specified by the manufacturer, usually 1/8 to 1/4 inch. Too thin and you don't get adequate protection; too thick and it may not cure fully.
Most epoxy moisture barriers require 24-48 hours of cure time before terrazzo adhesive can be applied. Temperature and humidity matter enormously. Cold, humid conditions slow curing; warm, dry conditions speed it up. During curing, the epoxy must not be disturbed. Many contractors seal off the area with caution tape to prevent accidental disturbance.
Moisture Barrier Options: Vapor Barriers vs. Resinous Membranes
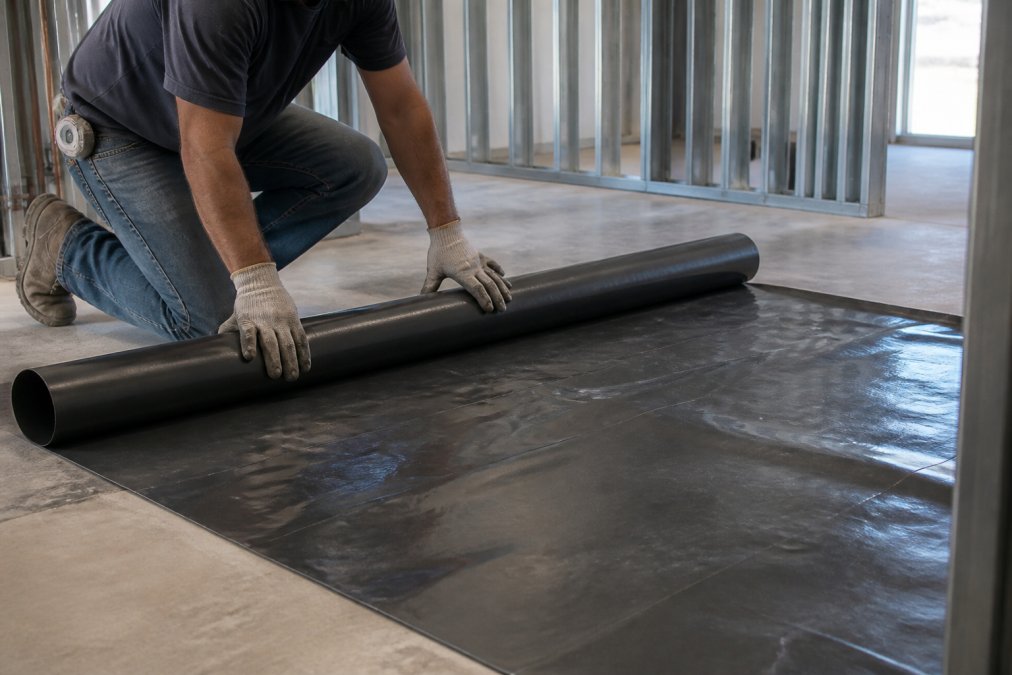
Vapor barriers are thin plastic or polyethylene films, typically 4-6 mils thick. They block moisture transmission by creating a physical barrier that water vapor cannot pass through. They're inexpensive, quick to install, and require minimal preparation. The downside is that they don't bond to the concrete or adhesive; they simply lay on top, creating a weak point if the adhesive doesn't grip the terrazzo well. Vapor barriers work best on concrete slabs above grade where hydrostatic pressure is low.
Resinous membranes, typically epoxy or polyurethane coatings, are thicker (usually 1/8 to 1/4 inch) and serve dual purpose: they block moisture and bond the adhesive to the concrete. They're more expensive and take longer to install and cure, but they provide superior protection and a stronger overall system. They're the standard choice for critical applications in hospitals, airports, and below-grade installations where moisture pressure is high.
For most commercial terrazzo installations, especially in healthcare and high-traffic facilities, an epoxy resinous membrane is the better choice. The additional cost upfront is far less than the cost of ripping out failed terrazzo and reinstalling it.
Signs of Moisture Barrier Failure and Prevention
Even with a properly installed moisture barrier, failure can occur if installation wasn't done correctly or conditions change after installation.
Adhesion failure is the most common sign. The terrazzo begins to crack or separate from the concrete beneath, often in patterns radiating from a central point or forming a grid, indicating the adhesive has lost bond. This typically happens when the barrier wasn't applied evenly, wasn't fully cured before adhesive was applied, or the substrate wasn't clean.
Spalling occurs when chunks of terrazzo pop out or flake away, usually caused by moisture bypassing the barrier and pushing from below. Visible moisture or efflorescence (white salt deposits) on the terrazzo surface indicates water vapor is escaping through the floor, meaning the barrier either wasn't installed or has failed. Curling or buckling at edges suggests moisture is entering from the sides or below, causing uneven expansion.
To prevent these failures, ensure the substrate is truly clean and dry before the barrier is applied. Verify the barrier is applied to full specified thickness. Don't rush curing time. Ensure the barrier extends to the walls and all seams and penetrations are sealed. If dealing with previously failed terrazzo, understand why it failed and address the root cause.
Flooring Compatibility and Installation Requirements
Not every flooring type works equally well with every moisture barrier.
Terrazzo is highly compatible with epoxy resinous membranes. The epoxy blocks moisture and provides an excellent bonding surface for terrazzo adhesive. Engineered wood and laminate flooring are moisture-sensitive and require a vapor barrier with very low permeance, ideally below 0.3 perms. Epoxy membranes typically meet this requirement. Vinyl plank flooring (LVP) and vinyl sheet are less moisture-sensitive but still benefit from a low-permeance barrier. Tile and stone are relatively moisture-insensitive, but the adhesive used to install them can be affected by moisture.
The key compatibility factor is the flooring adhesive. Some adhesives are moisture-sensitive and require a barrier with very low permeance. Before selecting a moisture barrier, check the flooring manufacturer's specifications and the adhesive manufacturer's requirements. Confirm that your chosen barrier meets those requirements.
A moisture barrier is the foundation of a durable terrazzo installation. Without it, even the best terrazzo craftsmanship fails when moisture from the concrete slab attacks the adhesive and weakens the bond. A1 Terrazzo has installed thousands of square feet of terrazzo with proper moisture mitigation in hospitals, airports, schools, and government buildings across Florida. The difference between a floor that lasts decades and one that fails within years often comes down to whether the moisture barrier was installed correctly and whether it matched the specific requirements of the substrate and flooring being installed. Get the moisture barrier right, and your terrazzo investment will perform reliably in even the most demanding environments.
Contact A1 Terrazzo to discuss your moisture barrier installation and ensure your flooring is protected from the ground up.
Frequently Asked Questions
Q: How do you test for moisture levels before installing a moisture barrier?
A: Two primary methods determine if your concrete substrate needs a moisture barrier. Calcium chloride testing measures moisture vapor emission rate (MVER) by placing a test dome on the slab for 24-72 hours. In situ humidity probes inserted into the concrete measure relative humidity directly. Testing should occur at multiple locations across the slab, especially in below-grade areas where hydrostatic pressure increases moisture risk.
Q: What is the difference between a vapor barrier and a resinous membrane for terrazzo?
A: A vapor barrier is a thin plastic or polyethylene sheet that blocks moisture transmission from below the slab. A resinous membrane, typically epoxy-based, creates a chemical bond with the substrate while sealing moisture. Resinous membranes offer superior adhesion and durability. For glue-down terrazzo installations, epoxy resinous coatings can provide better long-term performance.
Q: What does ASTM F3010 require for moisture mitigation under terrazzo?
A: ASTM F3010 is the standard for moisture barriers under resilient flooring and applies to terrazzo installations. It specifies that moisture vapor emission rate must not exceed 3 pounds per 1,000 square feet per 24 hours. The standard requires surface preparation to remove contaminants, proper curing times before flooring installation, and testing verification. Compliance with F3010 protects against moisture-related failures like cracking and adhesion failure in commercial spaces.
Q: Can you apply a moisture barrier over existing terrazzo flooring?
A: Yes, but it requires thorough preparation. The existing terrazzo must be cleaned and ground to remove sealers and contaminants. Shot blasting or diamond grinding creates surface porosity for proper epoxy bonding. However, if the existing terrazzo shows signs of moisture damage, moisture testing must confirm the substrate is dry before application. This process is more labor-intensive than applying barriers to new concrete slabs.
Q: What are common signs that a moisture barrier has failed?
A: Failed moisture barriers typically show adhesion failure, where the terrazzo separates from the substrate in patches. You may notice cracking in a pattern that follows the slab's natural movement, or discoloration and soft spots indicating water damage. Efflorescence (white chalky deposits) signals moisture traveling through the substrate. Mold or mildew growth indicates moisture penetration. These failures usually occur if barriers were improperly applied or if curing times were not observed before flooring installation.
Q: How long does an epoxy moisture barrier need to cure before flooring installation?
A: Most epoxy resinous coatings require 48-72 hours of curing time before terrazzo installation can begin. Full cure may take 7-14 days depending on temperature, humidity, and epoxy formulation. Relative humidity and temperature during curing affect cure time significantly; cold or humid conditions extend curing periods. Installing flooring before proper curing causes bonding failures and voids the moisture barrier's protection. Professional installers verify cure by touch testing and may use moisture meters to confirm the coating is ready for the next phase.
Q: What flooring types work best over epoxy moisture barriers?
A: Terrazzo, engineered wood, vinyl plank, and laminate flooring all work over properly applied epoxy moisture barriers. Glue-down installations require moisture-sensitive adhesives compatible with the epoxy coating. Floating floor systems work well because they don't rely on adhesive bonding. The compatibility depends on the epoxy's surface finish and porosity. Some epoxies require a bonding agent or primer before adhesive application. Always verify adhesive compatibility with your epoxy manufacturer and follow installation specifications for each flooring type to prevent adhesion failure.
Q: Is DIY moisture testing as reliable as professional testing?
A: DIY calcium chloride test kits are available and provide usable data, but professional testing offers advantages. Professional testers use calibrated equipment, test multiple locations systematically, and interpret results within ASTM F3010 context. They identify substrate contamination issues DIY kits might miss. For commercial spaces like hospitals or airports where failure is costly, professional testing provides documentation. DIY testing works for small residential projects or preliminary assessment, but commercial terrazzo installations can benefit from professional verification before barrier application.
This article was written using GrandRanker
Frequently Asked Questions
Q: How do you test for moisture levels before installing a moisture barrier?
A: Two primary methods determine if your concrete substrate needs a moisture barrier. Calcium chloride testing measures moisture vapor emission rate (MVER) by placing a test dome on the slab for 24-72 hours. In situ humidity probes inserted into the concrete measure relative humidity directly. Testing should occur at multiple locations across the slab, especially in below-grade areas where hydrostatic pressure increases moisture risk.
Q: What is the difference between a vapor barrier and a resinous membrane for terrazzo?
A: A vapor barrier is a thin plastic or polyethylene sheet that blocks moisture transmission from below the slab. A resinous membrane, typically epoxy-based, creates a chemical bond with the substrate while sealing moisture. Resinous membranes offer superior adhesion and durability. For glue-down terrazzo installations, epoxy resinous coatings can provide better long-term performance.
Q: What does ASTM F3010 require for moisture mitigation under terrazzo?
A: ASTM F3010 is the standard for moisture barriers under resilient flooring and applies to terrazzo installations. It specifies that moisture vapor emission rate must not exceed 3 pounds per 1,000 square feet per 24 hours. The standard requires surface preparation to remove contaminants, proper curing times before flooring installation, and testing verification. Compliance with F3010 protects against moisture-related failures like cracking and adhesion failure in commercial spaces.
Q: Can you apply a moisture barrier over existing terrazzo flooring?
A: Yes, but it requires thorough preparation. The existing terrazzo must be cleaned and ground to remove sealers and contaminants. Shot blasting or diamond grinding creates surface porosity for proper epoxy bonding. However, if the existing terrazzo shows signs of moisture damage, moisture testing must confirm the substrate is dry before application. This process is more labor-intensive than applying barriers to new concrete slabs.
Q: What are common signs that a moisture barrier has failed?
A: Failed moisture barriers typically show adhesion failure, where the terrazzo separates from the substrate in patches. You may notice cracking in a pattern that follows the slab's natural movement, or discoloration and soft spots indicating water damage. Efflorescence (white chalky deposits) signals moisture traveling through the substrate. Mold or mildew growth indicates moisture penetration. These failures usually occur if barriers were improperly applied or if curing times were not observed before flooring installation.
Q: How long does an epoxy moisture barrier need to cure before flooring installation?
A: Most epoxy resinous coatings require 48-72 hours of curing time before terrazzo installation can begin. Full cure may take 7-14 days depending on temperature, humidity, and epoxy formulation. Relative humidity and temperature during curing affect cure time significantly; cold or humid conditions extend curing periods. Installing flooring before proper curing causes bonding failures and voids the moisture barrier's protection. Professional installers verify cure by touch testing and may use moisture meters to confirm the coating is ready for the next phase.
Q: What flooring types work best over epoxy moisture barriers?
A: Terrazzo, engineered wood, vinyl plank, and laminate flooring all work over properly applied epoxy moisture barriers. Glue-down installations require moisture-sensitive adhesives compatible with the epoxy coating. Floating floor systems work well because they don't rely on adhesive bonding. The compatibility depends on the epoxy's surface finish and porosity. Some epoxies require a bonding agent or primer before adhesive application. Always verify adhesive compatibility with your epoxy manufacturer and follow installation specifications for each flooring type to prevent adhesion failure.
Q: Is DIY moisture testing as reliable as professional testing?
A: DIY calcium chloride test kits are available and provide usable data, but professional testing offers advantages. Professional testers use calibrated equipment, test multiple locations systematically, and interpret results within ASTM F3010 context. They identify substrate contamination issues DIY kits might miss. For commercial spaces like hospitals or airports where failure is costly, professional testing provides documentation. DIY testing works for small residential projects or preliminary assessment, but commercial terrazzo installations can benefit from professional verification before barrier application.