 how-to
Terrazzo Substrate Preparation: Best Practices Guide
Table of Contents
- Why Substrate Preparation Determines Terrazzo Floor Success
- Concrete Surface Profile (CSP) for Terrazzo: Achieving the Right Texture
- Terrazzo Substrate Flatness Tolerances: Meeting Industry Standards
- Terrazzo Concrete Moisture Testing: Preventing Bond Failure
- Cleaning, Debris Removal, and Crack Repair
- Equipment and Tools You'll Need
- Common Substrate Preparation Mistakes That Cause Terrazzo Failure
- Conclusion
- Frequently Asked Questions
Last Updated: September 1, 2026
Why Substrate Preparation Determines Terrazzo Floor Success
The difference between a terrazzo floor that lasts 30 years and one that fails in 18 months comes down to substrate preparation. Most contractors and facility managers don't realize this until cracks, delamination, or moisture damage appears, by then, the real problem was set months earlier, beneath the surface. This guide covers the essential steps to prepare concrete for terrazzo: concrete surface profile requirements, flatness tolerances, moisture testing, debris removal, and necessary equipment. The investment in proper substrate preparation pays for itself the first time you don't have to tear out and reinstall a failed floor.
Concrete Surface Profile (CSP) for Terrazzo: Achieving the Right Texture
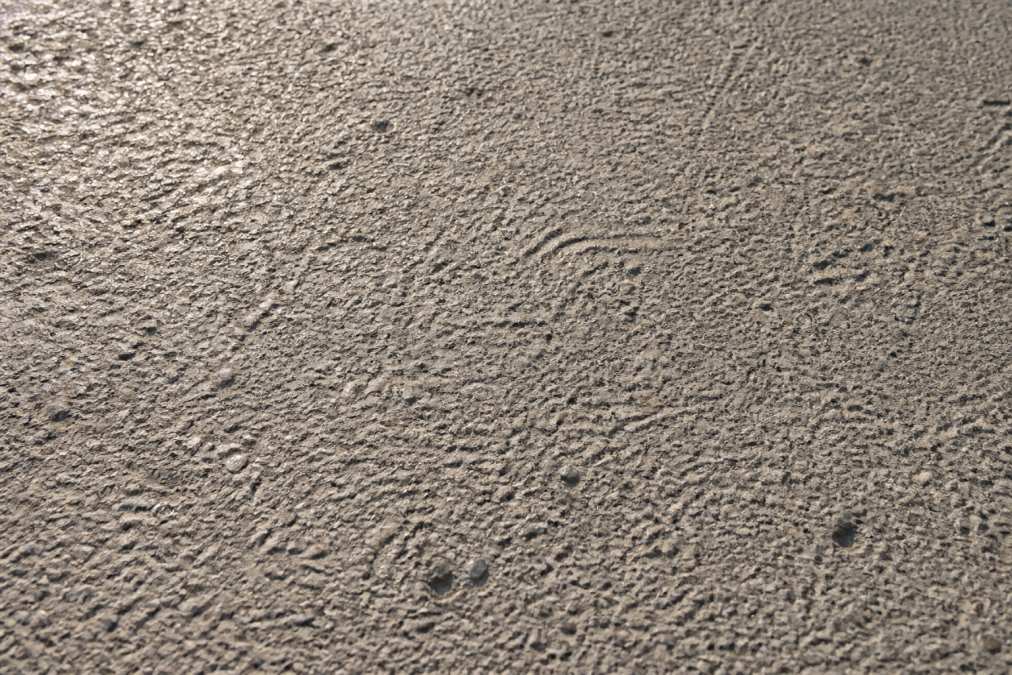
Concrete surface profile (CSP) is a measure of the texture and roughness of a concrete surface, rated on a standardized scale from CSP-1 (smooth) to CSP-9 (heavily profiled). For terrazzo installation, achieving the correct CSP is non-negotiable. The epoxy binders and bonding agents used in terrazzo flooring depend on adequate surface texture to create mechanical adhesion. Without it, delamination becomes inevitable.
Understanding CSP Ratings and Terrazzo Requirements
Most epoxy terrazzo systems require a CSP-3 to CSP-5 surface. CSP-3 provides light mechanical profile with some exposed aggregate. CSP-4 offers moderate texture with visible aggregate exposure. CSP-5 delivers heavier profile with substantial aggregate exposure and surface roughness. Some thin-set epoxy terrazzo systems perform well at CSP-3, while others, particularly those involving bonding agents like TERRAZZCO Bonding Agent 159, benefit from CSP-4 or CSP-5 for maximum mechanical interlock and tensile strength. Check your terrazzo manufacturer's specifications before starting surface preparation.
Test CSP with a CSP replica tape or depth gauge. A properly profiled surface will show consistent texture across the entire slab with no shiny spots or smooth areas where the profile has been missed.
Shotblasting and Mechanical Grinding Methods
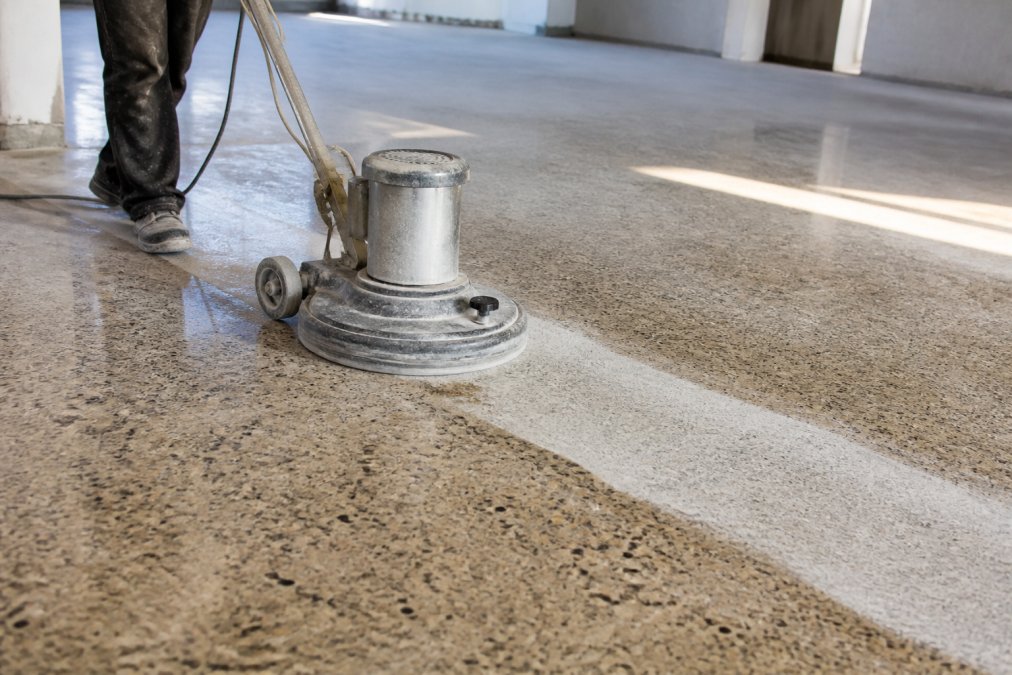
Shotblasting is the industry standard for achieving consistent, repeatable CSP on large concrete surfaces. The process uses abrasive steel shot propelled at high velocity to impact the concrete, removing laitance (the weak surface layer of cement paste), exposing aggregate, and creating mechanical texture.
The Husqvarna Blastrac 1-8DPS30 is a common choice for medium-sized projects. It's a self-propelled walk-behind machine that covers 450-600 square feet per hour, works virtually dust-free when connected to a dust collector, and consumes abrasive at less than 9 pounds per hour. For smaller areas or precision work, handheld angle grinders with abrasive cups or stones can achieve similar results, though the process is slower and more labor-intensive.
Mechanical grinding with diamond grinding wheels is another option, particularly for removing coatings or leveling high spots. Most professionals combine grinding with shotblasting: grind first to remove coatings or level the surface, then shotblast to achieve the required CSP. A common mistake is assuming that any dust-free blasting method is adequate. Some contractors use dry ice blasting or other low-impact methods to avoid dust. These methods may clean the surface but don't create the mechanical profile that terrazzo requires. The concrete surface will feel smooth or waxy, not rough. When the terrazzo is installed, poor adhesion causes the floor to fail within months.
Terrazzo Substrate Flatness Tolerances: Meeting Industry Standards
Flatness is equally critical as surface profile. A concrete slab with excellent CSP but poor flatness creates inconsistent terrazzo thickness and stress concentrations at low spots where the terrazzo is thinner, leading to cracking and premature failure.
Ten-Foot Span Testing and Measurement
Industry standards, including ASTM specifications for concrete flatness, typically require that a 10-foot straightedge laid across the concrete surface should not deviate by more than 1/4 inch from the high points. Test the slab systematically using a 10-foot straightedge and measure vertically at multiple points across the entire floor. Mark any areas where the deviation exceeds 1/4 inch. When the terrazzo is installed over a wavy substrate, the adhesive layer thickness varies. Thin spots bond weakly and are prone to cracking. Thick spots create stress concentrations. Over time, thermal cycling and foot traffic work the terrazzo off the substrate.
Using Leveling Compounds for Out-of-Spec Slabs
If your concrete doesn't meet flatness tolerances, leveling compounds bring it into spec. ARDEX K 15 Self-Leveling Underlayment is a Portland cement-based, high-strength, non-shrink compound that achieves 5,500 psi compressive strength at 28 days and is ready for floor coverings in 1-3 days depending on thickness. It can be applied from featheredge up to several inches and is compatible with concrete, terrazzo, and other approved substrates.
Schönox US Cement-Based Self-Leveling Compound offers similar performance with a moisture-resistant formula suitable for both interior and exterior use. For minor variations under 1/8 inch, MAPEI Planiprep SC Skimcoating Compound is faster, setting in 30 to 60 minutes. Apply leveling compounds before moisture testing. A flat substrate prevents far more costly problems downstream.
Terrazzo Concrete Moisture Testing: Preventing Bond Failure
Moisture is the silent killer of terrazzo installations. Excess moisture in the concrete slab migrates upward, carrying salts and other contaminants. When it reaches the terrazzo layer, it breaks the bond between the epoxy binder and the concrete, causing delamination, blistering, and eventual floor failure.
Vapor Emission Rate (VER) and Relative Humidity Limits
Terrazzo concrete moisture testing follows ASTM F2170, which measures relative humidity (RH) at depth within the concrete slab (astm.org). Most epoxy terrazzo systems require that concrete RH not exceed 75% to 85%, depending on the specific binder system. Test the concrete at multiple locations across the slab, at least 40% of the distance from the surface to the bottom of the slab. In a 4-inch slab, test at approximately 1.6 inches depth. Test at least three locations per 1,000 square feet of floor area. The test takes 24 hours or more to equilibrate. Don't rush this step. A reading taken before equilibration is meaningless and may lead you to install terrazzo over a substrate that's still too wet.
If RH exceeds 75%, you have two options: wait longer for the concrete to dry, or apply a moisture barrier.
When to Apply Moisture Barriers
Moisture barriers are epoxy sealers applied to the concrete surface to reduce vapor transmission. TERRAZZCO Vapor Shield MVS 601 is a 100% solids, two-component epoxy system designed specifically for terrazzo. It mitigates moisture vapor transmission rates through concrete, is VOC-free, and doesn't affect the surface profile of the concrete. It's effective for slabs with RH between 75% and 95%.
Custom Building Products RedGard is a ready-to-use elastomeric waterproofing membrane that can serve as a moisture barrier. Apply the moisture barrier according to manufacturer instructions, typically with a roller or squeegee, after the concrete has been properly profiled and cleaned, and after moisture testing confirms the need for it.
Cleaning, Debris Removal, and Crack Repair
After shotblasting and leveling, the substrate must be completely clean. Dust, laitance, curing compounds, sealers, and other contaminants prevent proper adhesion and cause bond failure.
Removing Contaminants and Curing Compounds
Shotblasting removes much of the surface contamination, but dust and fine particles remain. Vacuum the entire floor thoroughly with an industrial HEPA-filter vacuum. After vacuuming, wash the floor with clean water and a soft-bristle brush to remove remaining dust and any residual curing compounds. Concrete curing compounds are wax-based or silicone-based coatings applied during curing to retain moisture. They create a slick surface that prevents adhesion. Pressure washing can remove them, but use low pressure (below 3,000 psi) to avoid damaging the newly profiled surface.
Allow the floor to dry completely before proceeding. In humid conditions, this may take 24-48 hours.
Isolating and Treating Active Cracks
Active cracks are those that move due to slab deflection, thermal cycling, or settlement. If you install terrazzo over an active crack without treating it, the crack will propagate through the terrazzo, and the floor will fail. Identify active cracks by marking them with chalk and observing them over several days. If the crack width changes, it's active.
For active cracks, use a crack isolation membrane. Custom Building Products RedGard Waterproofing and Crack Prevention Membrane is designed to isolate cracks up to 1/8 inch. Clean the crack thoroughly, removing any loose material, and apply the membrane according to manufacturer instructions, extending it at least 6 inches on either side of the crack. For larger cracks, route the crack to a consistent width (typically 1/4 inch), clean it, and fill it with a flexible epoxy repair compound or polyurethane sealant before applying the crack isolation membrane.
Equipment and Tools You'll Need
Proper equipment ensures consistent, professional results and protects workers from dust and injury.
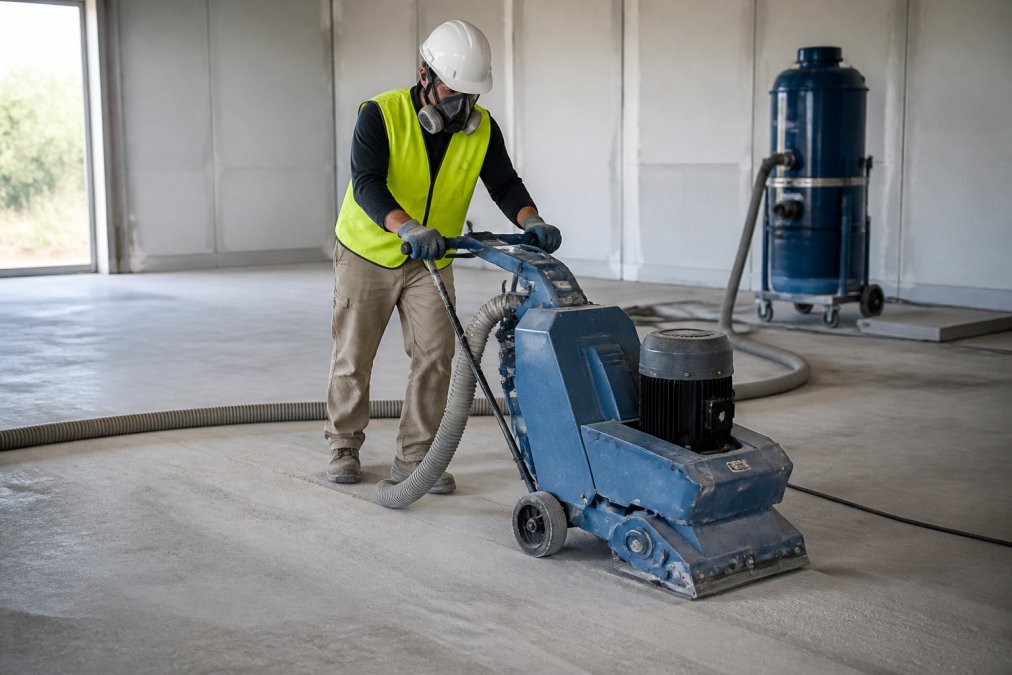
For surface profiling, you'll need either a shotblasting machine or mechanical grinding equipment. The Husqvarna Blastrac 1-8DPS30 is a standard choice for medium-sized projects. For smaller areas, a 7-inch angle grinder with a diamond grinding cup works, though it's slower. Always use an industrial dust collector connected to the equipment.
For flatness testing, a 10-foot straightedge is essential. A laser level can also verify flatness but should be used in conjunction with a straightedge for accuracy. For moisture testing, you'll need either calcium chloride test kits (ASTM F1869) or relative humidity probes (ASTM F2170). For cleaning, use an industrial HEPA-filter vacuum, soft-bristle brushes, and a pressure washer rated for 2,500-3,000 psi maximum. For applying leveling compounds, moisture barriers, or bonding agents, you'll need trowels, squeegees, rollers, and mixing equipment.
Personal protective equipment is non-negotiable. Dust from shotblasting and grinding contains silica, which causes serious respiratory damage (the CDC). Use a NIOSH-approved respirator (not just a dust mask), safety glasses, hearing protection, and gloves.
| Equipment / Tool | Purpose | Notes |
|---|---|---|
| Shotblasting machine or angle grinder | Achieve concrete surface profile (CSP) | Shotblaster preferred for large areas; grinder for small areas |
| Industrial dust collector | Capture dust during profiling | Must be HEPA-filter rated |
| 10-foot straightedge | Test concrete flatness | Essential for meeting tolerances |
| Laser level | Verify flatness across large areas | Supplement to straightedge, not replacement |
| Moisture testing kit (RH probe or calcium chloride) | Measure concrete relative humidity | Required before moisture barrier application |
| Industrial HEPA vacuum | Remove dust and debris | Standard shop vacs redistribute fine particles |
| Pressure washer (2,500-3,000 psi) | Remove curing compounds and remaining dust | Low pressure prevents surface damage |
| Trowels, squeegees, rollers | Apply leveling compounds, barriers, bonding agents | Various sizes for different applications |
| Mixing equipment | Prepare two-component epoxy systems | Paddles and power drill for small batches; dedicated mixer for large projects |
| NIOSH-approved respirator, safety glasses, gloves, hearing protection | Worker protection | Non-negotiable; required by OSHA |
Common Substrate Preparation Mistakes That Cause Terrazzo Failure
Understanding where installations go wrong helps you avoid the same traps.
Skipping Moisture Testing
This is the single most common error. A contractor or facility manager looks at the concrete, sees that it looks dry, and assumes it's ready for terrazzo. Months after installation, the terrazzo starts showing signs of moisture damage: blistering, soft spots, or delamination. Moisture testing is inexpensive and takes only a day or two. If the RH is elevated, either wait for the concrete to dry naturally or apply a moisture barrier. Both options are cheaper than replacing a failed floor.
Inadequate Surface Profiling
A concrete surface that looks rough to the eye may not have adequate CSP for terrazzo adhesion. Some contractors use light grinding or pressure washing, thinking it's sufficient. The surface feels cleaner, but the mechanical profile is inadequate. When the terrazzo is installed, the epoxy binder doesn't grip the surface properly. Test the CSP with a replica tape or depth gauge. Don't rely on visual inspection. If the profile is inadequate, shotblast or grind more aggressively until the CSP meets specifications.
Ignoring Environmental and Temperature Conditions
Epoxy terrazzo systems are sensitive to temperature and humidity during installation. Most epoxy products require substrate and air temperatures between 50°F and 85°F during application and curing. Humidity should be below 85% relative humidity. Installing terrazzo in cold weather slows or halts epoxy curing, and the binder doesn't develop proper strength. Schedule terrazzo installation during seasons when temperature and humidity are within the product specifications. If the project must proceed in unfavorable conditions, use heated tents or dehumidifiers to control the environment.
Conclusion
Substrate preparation determines whether your terrazzo floor becomes a 30-year asset or a 2-year liability. It requires attention to concrete surface profile, flatness tolerances, moisture testing, and thorough cleaning. Properly prepared substrates support terrazzo floors that outlast the buildings they're installed in.
If you're planning a terrazzo installation, invest in proper substrate preparation. Test the concrete, profile it correctly, verify flatness, check moisture, and clean thoroughly. Contact A1 Terrazzo to discuss your project and ensure your substrate meets every requirement for a successful, durable installation.
Frequently Asked Questions
Why is substrate preparation critical for terrazzo flooring longevity?
Proper substrate preparation ensures strong bond strength between the concrete and terrazzo topping, preventing delamination and cracking. A well-prepared surface removes contaminants, achieves the correct porosity, and meets flatness tolerances. Skipping or rushing this step is a leading cause of premature terrazzo failure. Poor preparation can result in costly repairs.
What are the moisture content requirements for concrete substrates before terrazzo installation?
Concrete must be tested for moisture vapor emission using ASTM F-2170 calcium chloride testing or equivalent. Relative humidity should not exceed 75% before terrazzo installation. If readings exceed this threshold, a moisture barrier such as an epoxy vapor shield may be applied. Testing prevents moisture from migrating through the slab and causing adhesion failure, which can manifest as cracking, bubbling, or separation of the terrazzo surface.
What concrete surface profile (CSP) rating do terrazzo installations require?
Terrazzo typically requires a CSP 2 or CSP 3 profile, depending on the binder system. CSP 2 produces a lightly textured surface with visible aggregate exposure, while CSP 3 creates a more aggressive texture with deeper aggregate exposure. Your terrazzo supplier or installer will specify the exact requirement based on the epoxy or thin-set system being used. Achieving the correct profile is essential for mechanical adhesion and long-term bond strength.
How do you know if your substrate preparation has failed before terrazzo is installed?
Signs of inadequate preparation include visible cracks not isolated, surface contamination like dust or oil residue, high moisture readings, flatness exceeding tolerances (more than 1/8 inch variation over 10 feet), or an overly smooth surface lacking proper profile. A professional inspection using straightedges, moisture meters, and visual assessment can help identify these issues before installation. Addressing problems at this stage prevents costly rework after terrazzo is applied.
This article was written using GrandRanker
Frequently Asked Questions
Why is substrate preparation critical for terrazzo flooring longevity?
Proper substrate preparation ensures strong bond strength between the concrete and terrazzo topping, preventing delamination and cracking. A well-prepared surface removes contaminants, achieves the correct porosity, and meets flatness tolerances. Skipping or rushing this step is a leading cause of premature terrazzo failure. Poor preparation can result in costly repairs.
What are the moisture content requirements for concrete substrates before terrazzo installation?
Concrete must be tested for moisture vapor emission using ASTM F-2170 calcium chloride testing or equivalent. Relative humidity should not exceed 75% before terrazzo installation. If readings exceed this threshold, a moisture barrier such as an epoxy vapor shield may be applied. Testing prevents moisture from migrating through the slab and causing adhesion failure, which can manifest as cracking, bubbling, or separation of the terrazzo surface.
What concrete surface profile (CSP) rating do terrazzo installations require?
Terrazzo typically requires a CSP 2 or CSP 3 profile, depending on the binder system. CSP 2 produces a lightly textured surface with visible aggregate exposure, while CSP 3 creates a more aggressive texture with deeper aggregate exposure. Your terrazzo supplier or installer will specify the exact requirement based on the epoxy or thin-set system being used. Achieving the correct profile is essential for mechanical adhesion and long-term bond strength.
How do you know if your substrate preparation has failed before terrazzo is installed?
Signs of inadequate preparation include visible cracks not isolated, surface contamination like dust or oil residue, high moisture readings, flatness exceeding tolerances (more than 1/8 inch variation over 10 feet), or an overly smooth surface lacking proper profile. A professional inspection using straightedges, moisture meters, and visual assessment can help identify these issues before installation. Addressing problems at this stage prevents costly rework after terrazzo is applied.