 how-to
Can You Fix Chipped Terrazzo Flooring? A 2026 Guide
Table of Contents
- Assessing the Damage: Chips vs. Cracks vs. Spalling
- Tools and Materials for Chipped Terrazzo Flooring Repair
- Step-by-Step: How to Patch a Chip in Terrazzo
- Matching Aggregate and Color: The Science Behind the Blend
- Choosing the Right Terrazzo Floor Repair Kit
- Polishing, Sealing, and Post-Repair Maintenance
- What Does It Cost to Restore Terrazzo Flooring?
- The Best Terrazzo Floor Cleaner for Repaired Surfaces
- Frequently Asked Questions
Last Updated: September 19, 2026
Assessing the Damage: Chips vs. Cracks vs. Spalling
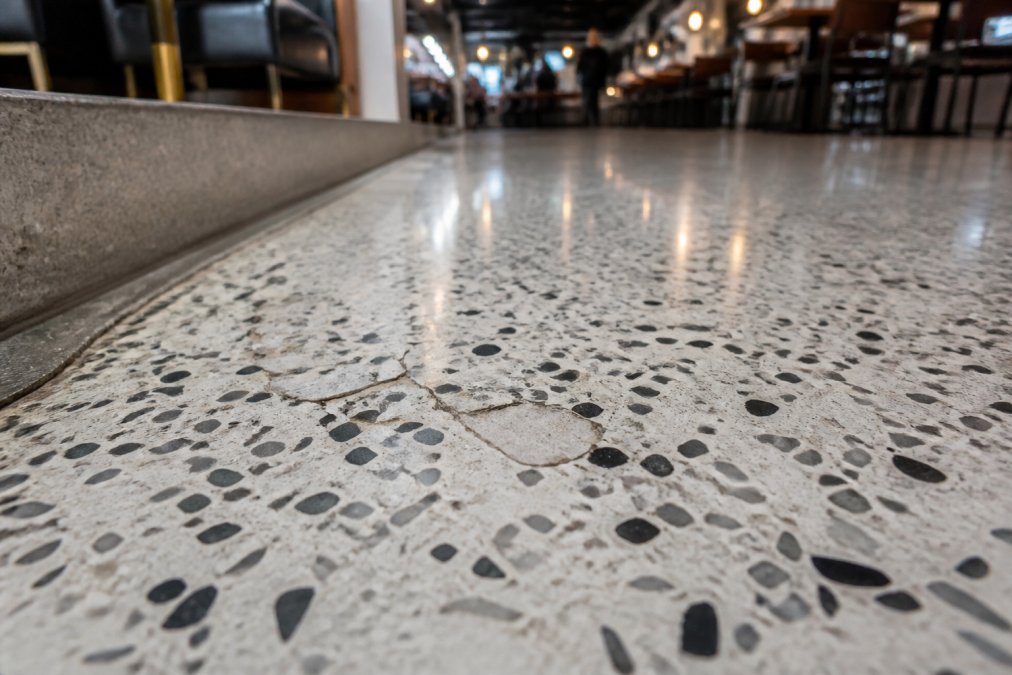
Yes, you can fix chipped terrazzo flooring, and most chips are repairable without replacing the floor. The right fix depends on what you're actually looking at, though, because a chip, a crack, and spalling are three different problems with three different repair paths.
A chip is a shallow break at the surface where a piece of aggregate or matrix has come loose. A crack is a linear split that runs through the matrix, often following a control joint or a substrate issue. Spalling is the broader failure where a section of the top layer separates and flakes away, usually from moisture or a bonding failure below.
That distinction matters. A chip is a cosmetic repair you can often handle in an afternoon. Spalling usually points to a substrate problem, and patching over it without fixing the cause just delays the next failure.
Tools and Materials for Chipped Terrazzo Flooring Repair
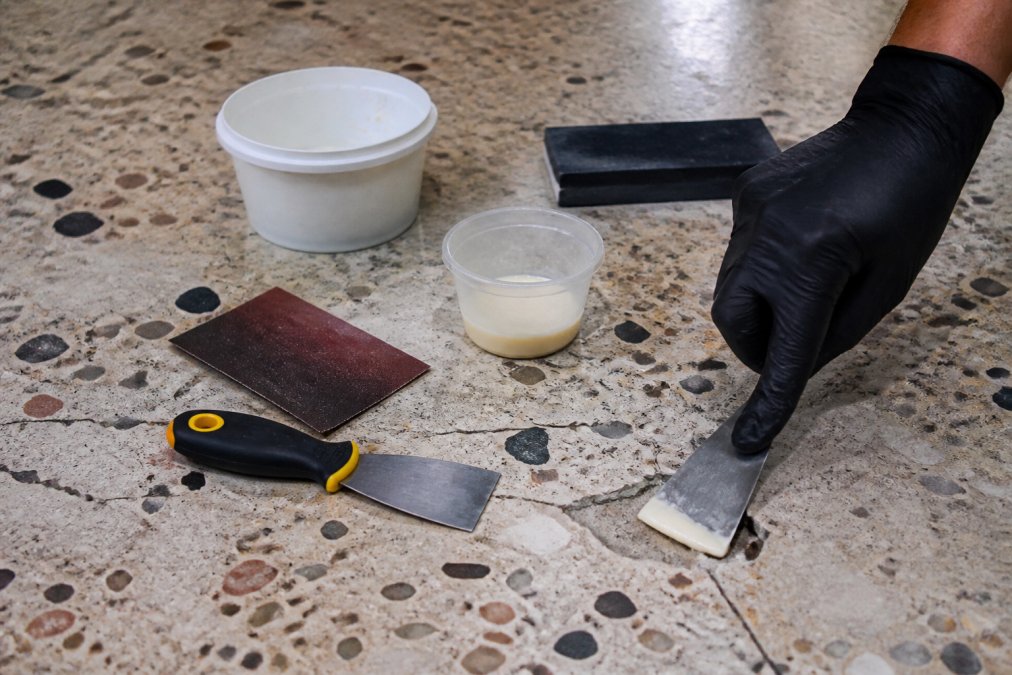
The right terrazzo floor repair kit covers two families of product: cementitious and epoxy-based. Cementitious patches match traditional terrazzo best because they cure to a similar hardness and take a polish the same way. Epoxy-based patches cure faster and bond aggressively, which makes them a good fit for small chips and high-traffic spots.
A basic kit includes:
- Matching aggregate and matrix binder
- A bonding agent or epoxy resin primer
- Diamond pads in a range of grits
- A putty knife or margin trowel
- A handheld buffer or variable-speed grinder
- A stone chisel for cleaning loose edges
- A pH-neutral sealer
For deeper repairs you'll also want a wet vac and a stiff brush for stain removal around the patch.
Step-by-Step: How to Patch a Chip in Terrazzo
A clean chip repair takes about an hour of active work plus curing time. The process is the same whether you're fixing one chip or twenty. The steps below assume you've already confirmed the damage is a chip and not spalling, if the surrounding matrix crumbles when you press it, stop and read the spalling section first.
Safety First: Silica Dust and PPE
Grinding, chiseling, or dry-sanding cured terrazzo releases respirable crystalline silica. The Occupational Safety and Health Administration (OSHA) regulates respirable crystalline silica exposure in construction under 29 CFR 1926.1153, and terrazzo work falls squarely inside that standard. The practical takeaway: never dry-grind terrazzo in an occupied space without dust controls.
A workable setup includes:
- A NIOSH-approved N95 or, better, a P100 half-mask respirator
- Sealed safety glasses or goggles, not open-side glasses
- A HEPA-filtered vacuum attached to the grinder's shroud
- A wet-grinding option, which suppresses dust at the source
- Plastic sheeting to isolate the work zone from occupied areas
Surface Preparation and Cleaning
Clean the chip and a few inches around it with a pH-neutral cleaner. Scrub out any dirt, wax, or old sealer, then let the area dry completely.
Use a stone chisel to undercut the edges of the chip. This is the step most DIY guides skip, and it's the one that determines whether the patch stays put. Undercutting creates a dovetail lip, a mechanical key, so the patch is locked into the matrix rather than relying on adhesion alone. A patch sitting on a flat, feathered edge has nothing to grip and will shear loose under foot traffic.
Vacuum out all dust with a HEPA unit.
Mixing and Applying the Patch
Mix your aggregate with the matrix binder to match the surrounding floor. Add aggregate in small amounts until the color and density look right. A common starting ratio for a cementitious matrix is roughly two parts aggregate to one part binder by volume, then adjust toward the surrounding floor's aggregate density, a floor with heavy 3/8-inch chips needs more stone than a fine-grind floor.
Curing, Grinding, and Leveling
Once cured, grind the patch flush using diamond pads, starting coarse and working finer. Use a variable-speed grinder and keep it moving, dwelling in one spot burns the resin in the matrix and leaves a permanent dark spot.
Post-Repair Blending Over Time
A fresh patch rarely matches a floor that's been walked on for years, because the surrounding terrazzo has aged, it's been abraded, re-sealed, and slightly dulled. The patch will look slightly brighter and crisper for the first few months. That's normal.
Matching Aggregate and Color: The Science Behind the Blend
Color matching is where most DIY repairs fail, and it's the topic almost every guide on the internet skips past with a vague "match the color" instruction. Terrazzo color comes from three things: the aggregate itself, the matrix, and the finish level. A patch can match the aggregate perfectly and still look wrong because the matrix is off or the polish is different.
The Three Variables You're Actually Matching
Aggregate. The stone chips are the most visible variable. They vary by size (a fine 1/16-inch grind versus a 3/8-inch chip floor), by color, and by supplier. Two "white marble" aggregates from different quarries can read warm or cool under the same light.
Sourcing a Match for Aged Terrazzo
Here's the problem no competitor addresses: you're not matching a new floor. You're matching a floor that's been aging for years. The surrounding terrazzo has oxidized, been abraded by foot traffic, and built up layers of sealer. Its color has drifted from what it was on day one.
A practical approach:
- Pull a small sample of loose aggregate from the chip itself. That tells you the exact stone mix in this floor, not a catalog approximation.
- If you can't source the original aggregate, look for a supplier that sells terrazzo chip blends by color family, and order a few samples to compare against the floor under natural light.
- Match the matrix to the current floor color, not the original spec. Mix a test batch, let it fully cure, and compare it to the surrounding floor, not to a color chip.
Mixing a Test Batch
Never commit a full patch to an untested mix. Mix a small batch, let it cure completely, then grind and polish it to the target grit. Compare it to the surrounding floor under natural daylight, not shop lighting, fluorescent and LED shop lights shift color temperature and will hide a mismatch that daylight reveals.
Finish Level Matters as Much as Color
Finish level matters just as much as pigment. If the surrounding floor is honed to a matte finish, a high-polish patch will stand out. Match the grit, not just the color. A 400-grit patch on an 800-grit floor reads as a dull spot; an 800-grit patch on a 400-grit floor reads as a bright spot. Either way, the eye catches it.
Choosing the Right Terrazzo Floor Repair Kit
Pick your kit by repair type, not by brand hype. Small chips and hairline cracks call for an epoxy-based filler. Larger chips and areas where you want the patch to age like the original floor call for a cementitious mix.
Polishing, Sealing, and Post-Repair Maintenance
After the patch is leveled and polished, seal the repaired area. A penetrating sealer protects against stains and moisture without changing the finish.
What Does It Cost to Restore Terrazzo Flooring?
The cost to restore terrazzo flooring depends on the size of the repair, the finish level you want, and whether the damage is surface-level or structural. A single chip is a small job. Full restoration across a large commercial floor is a different scope entirely.
The Best Terrazzo Floor Cleaner for Repaired Surfaces
The best terrazzo floor cleaner for a repaired surface is a pH-neutral, non-abrasive product. It protects the sealer and keeps the patch from aging faster than the surrounding floor.
Frequently Asked Questions
Can terrazzo floors be repaired?
Yes, chipped terrazzo flooring can be repaired. Small chips and cracks are often fixed with epoxy-based patching compounds that match the original color and aggregate. For larger or structural damage, professional restoration may be needed. Regular maintenance and prompt repairs extend the life of your terrazzo floor.
How much does it cost to restore terrazzo flooring?
The cost to restore terrazzo flooring varies based on damage extent, floor size, and whether you DIY or hire a pro. The cost for minor chip repairs versus full restoration varies. For accurate pricing, contact a professional terrazzo contractor for a quote tailored to your project.
What materials are needed to patch a terrazzo chip?
To patch a terrazzo chip, you'll need a terrazzo floor repair kit containing epoxy resin, color-matched aggregate, a bonding agent, and a putty knife. You'll also need sandpaper or diamond pads for grinding and polishing, plus a terrazzo floor cleaner for final cleanup. Kits are available from specialty suppliers.
Can you put epoxy on terrazzo?
Yes, epoxy is commonly used to repair terrazzo chips and cracks. Epoxy-based fillers bond well to the cementitious matrix and can be color-matched to blend with the existing floor. For best results, clean the area thoroughly, apply a bonding agent, and follow the manufacturer's instructions for mixing and curing.
Chipped terrazzo is fixable, but the repair only lasts as long as the prep and the maintenance behind it. If you'd rather not gamble on a patch that fails in a year, A1 Terrazzo brings 35 years of commercial terrazzo experience to every installation and restoration. We handle expert installation, professional maintenance, and full service coverage for commercial spaces, so your floor holds up to real traffic. Get started with A1 Terrazzo and protect the floor you already have.