 how-to
How to Install Terrazzo Flooring in Commercial Kitchens
Table of Contents
- Commercial Kitchen Flooring Requirements and Terrazzo Suitability
- Surface Preparation and Substrate Requirements
- Epoxy Terrazzo Installation Steps: Mixing and Application
- Terrazzo Floor Curing Time and Temperature Control
- Grinding, Polishing, and Slip Resistance Standards
- Grouting, Sealing, and Chemical Resistance
- Maintenance, Repair, and Health Department Compliance
- Downtime Management and Project Timeline
- Frequently Asked Questions
Last Updated: September 25, 2026
Commercial Kitchen Flooring Requirements and Terrazzo Suitability
Commercial kitchens demand flooring that withstands heat, moisture, grease, and constant foot traffic. How to install terrazzo flooring in commercial kitchens is critical because terrazzo is non-porous, durable, and seamless. A1 Terrazzo has spent 35 years perfecting commercial installations across hospitals and airports.
Terrazzo meets health department standards: it resists bacteria growth, handles thermal shock, and, unlike tile with grout joints, is seamless and easy to sanitize.
A proper terrazzo installation means years without repairs, avoiding cracked tile, loose grout, and water damage.
Surface Preparation and Substrate Requirements
The substrate makes or breaks the job. A weak concrete slab or moisture vapor transmission will cause adhesion failure.
Your concrete must be:
- Structurally sound with no active cracks
- Properly cured (28 days minimum for new concrete)
- Tested for moisture using calcium chloride or relative humidity testing
- Clean, free of dust, oils, and debris
- Leveled to within 1/8 inch per 10 feet
Moisture is the silent killer: if your slab absorbs moisture from below, the epoxy resin won't bond and the terrazzo will lift and separate. Test your substrate before pouring.
For commercial kitchens, a primer seals the concrete and ensures proper epoxy bonding. Skipping this step risks the entire project.
Epoxy Terrazzo Installation Steps: Mixing and Application
Mixing Epoxy Resin and Aggregates
The resin-to-aggregate ratio determines durability and appearance. Most commercial installations use 30-40% resin to 60-70% aggregate by weight.
For commercial kitchens, use aggregates that won't absorb moisture or stain easily, such as quartz sand or marble chips.
Mix in a clean container using a mechanical mixer to ensure consistent blending; contamination ruins the entire batch.
Maintain 65-75°F during mixing to achieve a 30-45 minute working window before the mixture gels.
Trowel Application and Leveling
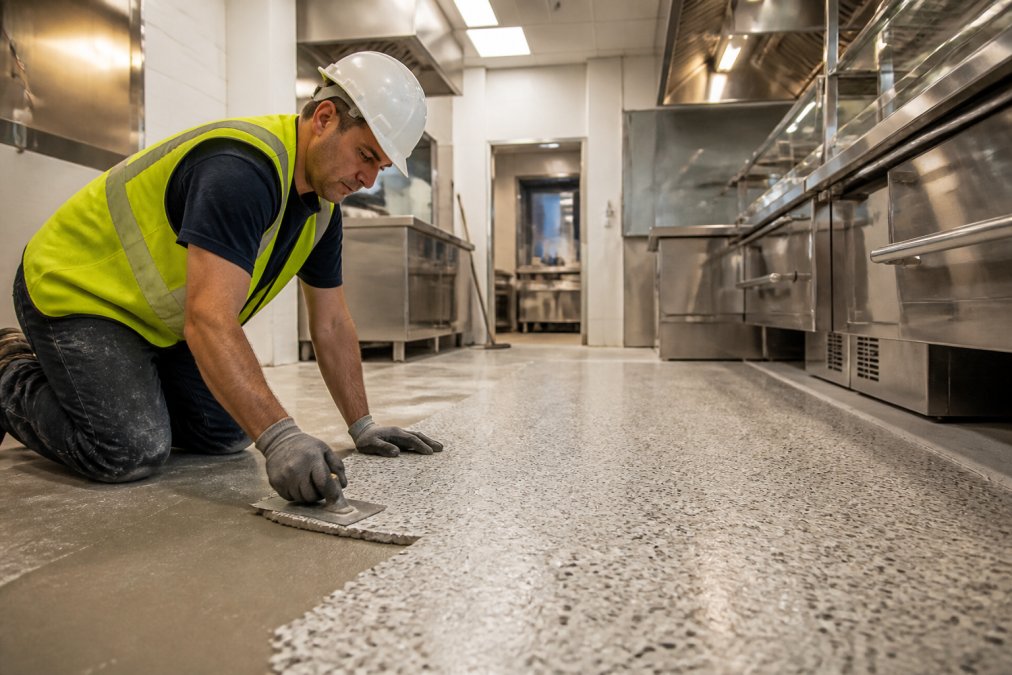
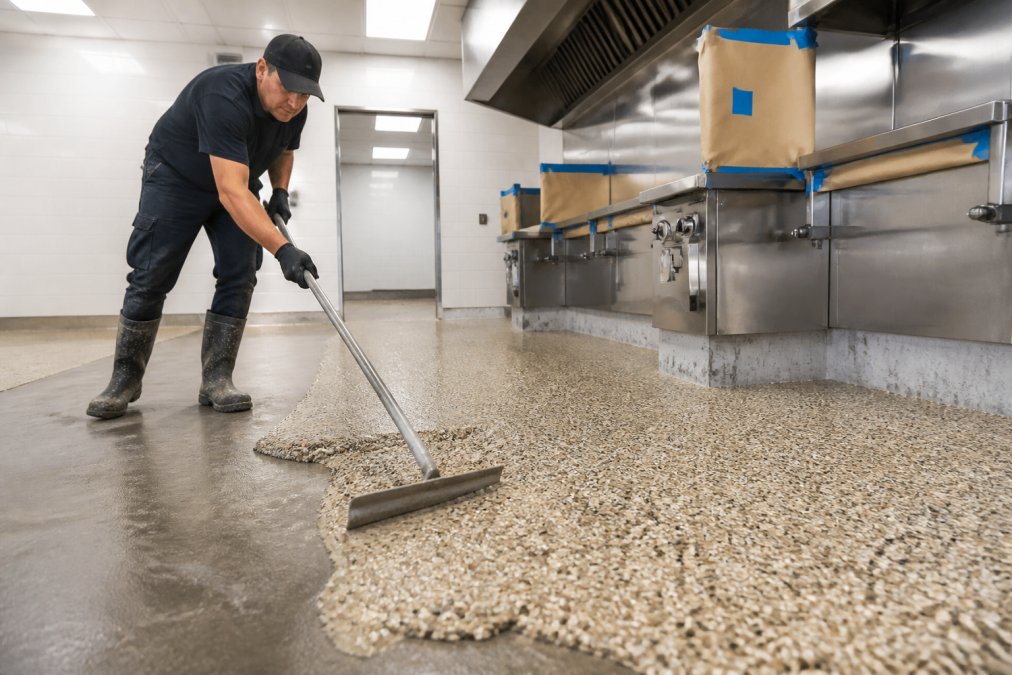
Spread the epoxy-aggregate mixture with a notched trowel in sections. Large commercial kitchen floors typically require two installers working simultaneously to prevent premature setting.
Trowel to consistent 1/4 inch to 3/8 inch thickness using a straightedge; small dips trap water and high spots create trip hazards.
Terrazzo Floor Curing Time and Temperature Control
Most epoxy terrazzo requires 24-48 hours for initial cure and 7 days for full strength. During curing, protect the floor from foot traffic and moisture.
Maintain 60-75°F during curing; cold temperatures slow the chemical reaction while excessive heat creates stress and micro-cracks.
High humidity affects curing; adjust ventilation systems as needed during this period.
Balance proper curing with operational needs by scheduling installations during low-traffic periods, overnight, or weekends.
Grinding, Polishing, and Slip Resistance Standards
After curing, grind and polish the terrazzo surface with diamond equipment to expose the aggregate and create the finished look.
Grinding progresses from coarse to fine diamonds, creating a smooth polished surface in 2-3 days for a typical commercial kitchen.
Slip resistance is critical in commercial kitchens. Industry standards recommend a dynamic coefficient of friction of 0.50 or higher for wet areas.
Control slip resistance through finish: satin or matte finishes provide better grip than high gloss, and textured topcoats add additional safety.
Grouting, Sealing, and Chemical Resistance
After grinding, fill small voids with color-matched grout to prevent debris from settling.
A quality sealer protects terrazzo from stains, moisture, oils, acids, and harsh cleaning agents, but not all sealers are created equal.
Chemical Resistance Testing and Performance
Terrazzo is highly chemical resistant due to its non-porous epoxy matrix, but the sealer determines real-world durability. Key test standards include ASTM D3359 (adhesion), ASTM D2248 (chemical resistance), ASTM D1141 (salt spray), and ASTM D4060 (abrasion resistance).
Commercial kitchens specifically expose flooring to:
Commercial kitchens expose floors to grease and oils, acidic cleaners, alkaline solutions, and bleach/sanitizers.
Sealer Selection for Commercial Kitchens
Three sealer types dominate commercial food service:
Three sealer types dominate.
For health department compliance, the sealer must be certified and non-toxic.
Validation Before Installation
Before committing to a sealer, verify chemical resistance against your facility's specific cleaning agents, cure time and temperature requirements, recoat interval, NSF/ANSI or FDA certification, and slip resistance rating.
Maintenance and Resealing Schedule
Daily cleaning with neutral pH cleaners keeps the floor new; avoid acidic cleaners.
Reseal depending on traffic. High-traffic zones may need annual spot resealing. Plan during maintenance windows to avoid disruption.
Small chips or cracks patch with epoxy-aggregate filler in 24 hours, far cheaper than tile replacement. Major damage requires grinding and repolishing a section.
Maintenance, Repair, and Health Department Compliance
Terrazzo is low-maintenance compared to tile, but it still needs care and strategic repair planning. Daily cleaning with neutral pH cleaners keeps it looking new. Avoid acidic cleaners that can damage the sealer.
Health Department Compliance Standards
Health departments regulate commercial kitchen flooring under multiple frameworks:
Terrazzo must be non-porous, seamless, stain-resistant, cleanable, and non-toxic. Use certified sealers within 6 feet of food prep surfaces, including under-counter areas, splash zones, and floors adjacent to prep tables.
Flooring must be smooth, non-absorbent, easily cleanable, and durable. Terrazzo meets all criteria when properly sealed and maintained.
OSHA requires slip-resistant surfaces (≥0.50 coefficient of friction), proper drainage, and regular inspection. Terrazzo with satin or textured finish and proper slope (1/8 inch per 10 feet) meets these requirements.
State and local codes may require inspections and repair of cracks/chips. Contact your local health department before installation to confirm requirements.
Documentation for Health Inspections
Maintain a floor maintenance log including installation date and credentials, sealer type, resealing dates, repair dates and methods, daily cleaning logs, and annual slip-resistance testing results.
Keep this log accessible during health inspections. A well-maintained log demonstrates due diligence and can prevent citations.
Repair and Patching Procedures for High-Traffic Areas
Commercial kitchens develop wear patterns in predictable zones: under fryers, in front of dishwashing stations, and along main traffic paths. Proactive repair prevents small damage from becoming structural problems.
Minor Chips and Cracks (< 1/4 inch), Clean with a wire brush, vacuum, apply epoxy primer, fill with color-matched filler, cure 24 hours, sand smooth, and reseal.
Moderate Damage (1/4 inch to 1 inch deep)
Larger cracks or spalls require grinding and repolishing a section:
- Mark the damaged area and extend the repair zone 12 inches beyond visible damage
- Use a diamond grinder to remove the top 1/8 inch of terrazzo across the repair zone
- Clean and prime the ground surface
- Apply fresh epoxy-aggregate mixture to match the original
- Allow to cure fully (48 hours)
- Grind and polish the repair zone to blend with surrounding floor
- Reseal the entire repaired section
High-Traffic Zone Preventive Maintenance
Zones that receive 10+ times normal foot traffic (fryer stations, dishwashing areas) should be resealed annually instead of every 2-3 years. Some facilities apply a protective polyurethane topcoat in these zones to extend sealer life.
Repair Scheduling to Minimize Downtime
For minor patches, work can often proceed during operating hours if the damaged area is cordoned off. For grinding and repolishing, schedule during:
- Overnight hours (10 PM-6 AM)
- Weekends
- Planned maintenance windows
- Slower seasons (e.g., January-February for restaurants)
Many facilities schedule preventive resealing of high-traffic zones during annual deep cleaning or equipment maintenance shutdowns. This approach prevents emergency repairs that disrupt operations.
Compliance Verification
After any repair, request a compliance inspection from your local health department if required by your jurisdiction. Confirm your requirements before repair work begins.
Terrazzo's seamless, non-porous design makes it one of the easiest commercial kitchen floors to maintain and repair.
Downtime Management and Project Timeline
Planning your installation timeline prevents operational disruption. Most commercial kitchens can't close for extended periods. A1 Terrazzo works with facility managers to minimize downtime.
A typical timeline:
- Day 1-2: Surface preparation and substrate testing
- Day 3: Primer application
- Day 4: Epoxy terrazzo mixing and application
- Day 5-6: Curing (facility closed or limited access)
- Day 7-8: Grinding and polishing
- Day 9: Sealing and final inspection
| Phase | Duration | Facility Status |
|---|---|---|
| Substrate prep | 2 days | Limited kitchen access |
| Epoxy application | 1 day | Kitchen closed |
| Curing | 2 days | Kitchen closed |
| Grinding/polishing | 2 days | Kitchen closed with ventilation |
| Sealing | 1 day | Limited access |
| Full operation | Day 10+ | Fully operational |
Frequently Asked Questions
What are the key steps involved in installing terrazzo flooring in a commercial kitchen?
Installation involves substrate preparation, primer application, mixing epoxy resin with aggregate, trowel application, curing for 48-72 hours, diamond grinding and polishing, grouting, sealing, and final topcoat application. Each step must follow manufacturer specifications and industry standards to ensure durability, slip resistance, and compliance with health department requirements for food service environments.
How long does terrazzo floor curing time take in a commercial kitchen before the space can reopen?
Terrazzo floor curing time typically requires 48-72 hours for foot traffic and 5-7 days before heavy equipment can be moved. In commercial kitchens, full cure and sealing can take 7-14 days depending on temperature, humidity, and epoxy formulation. Planning downtime around this schedule is critical for minimizing business interruption in high-traffic food service areas.
What commercial kitchen flooring requirements must terrazzo meet for health and safety compliance?
Terrazzo must meet commercial kitchen flooring requirements including slip resistance, non-porous sealing to prevent bacterial growth, chemical resistance to grease and sanitizers, and durability under thermal shock from hot and cold exposure. Proper sealing and maintenance protocols are essential for health department inspections.
Why do some terrazzo floors crack after installation, and how can this be prevented?
Cracking typically results from inadequate substrate preparation, insufficient moisture vapor transmission control, improper resin-to-aggregate ratio, or thermal stress from temperature fluctuations. Prevention requires thorough concrete slab inspection, moisture testing, proper primer application, precise mixing of epoxy resin and aggregates, controlled curing temperatures, and expansion joint placement. Professional installation with attention to these details prevents the substrate issues that cause premature failure.