 how-to
Commercial Terrazzo Installation Process: A Step-by-Step Guide
Table of Contents
- What Is the Commercial Terrazzo Installation Process
- Substrate Preparation for Terrazzo Flooring
- Mixing and Pouring Terrazzo Materials
- Divider Strip Installation and Leveling
- Terrazzo Floor Sealing and Polishing Process
- Terrazzo Flooring Installation Timeline and Curing
- Safety, Compliance, and Troubleshooting
- Frequently Asked Questions
Last Updated: September 23, 2026
What Is the Commercial Terrazzo Installation Process
The commercial terrazzo installation process is a multi-step method for creating durable, seamless flooring in high-traffic facilities. It involves preparing the substrate, mixing materials, pouring the base, installing dividers, grinding, polishing, sealing, and allowing proper curing time. A1 Terrazzo has over 35 years of specialized experience in commercial terrazzo flooring installation, ensuring precision for lasting results.
Commercial terrazzo differs from residential primarily in scale and performance demands. Commercial spaces require flooring that withstands constant foot traffic, equipment wheels, spills, and frequent cleaning, stresses the terrazzo installation process must account for from the start.
Understanding each step helps facility managers avoid costly mistakes. A single error during substrate preparation can cause cracking within months; improper curing leads to durability issues years later. This guide explains what happens during professional commercial terrazzo installation and why each step matters.
Substrate Preparation for Terrazzo Flooring
Before pouring terrazzo, the substrate must be properly prepared, this is where most installation failures begin.
Assess the concrete slab for cleanliness, structural soundness, and moisture. Moisture testing is non-negotiable; concrete with high moisture content causes premature terrazzo failure. Acceptable moisture levels are typically below 3 pounds per 1,000 square feet per 24 hours, though your installer should verify the specific requirement for your project.
Next, remove all contaminants:
- Dust, dirt, and debris
- Old adhesives or coatings
- Loose concrete particles
- Oil, grease, or chemical residue
Shot-blasting or grinding is the standard method. This mechanical process removes surface layers and creates texture that helps the bonding agent grip properly. Skip this step and your terrazzo will eventually separate from the substrate.
Check for cracks in the concrete slab. Small cracks may be acceptable; large structural cracks signal deeper problems and must be addressed before proceeding. The substrate must also be level, major low spots need to be filled to ensure uniform thickness throughout the installation.
Finally, apply a primer or bonding agent if required by your specifications. This chemical layer ensures adhesion between the concrete and the terrazzo materials. Different terrazzo systems use different bonding approaches, your installer should follow the manufacturer's requirements precisely.
Mixing and Pouring Terrazzo Materials
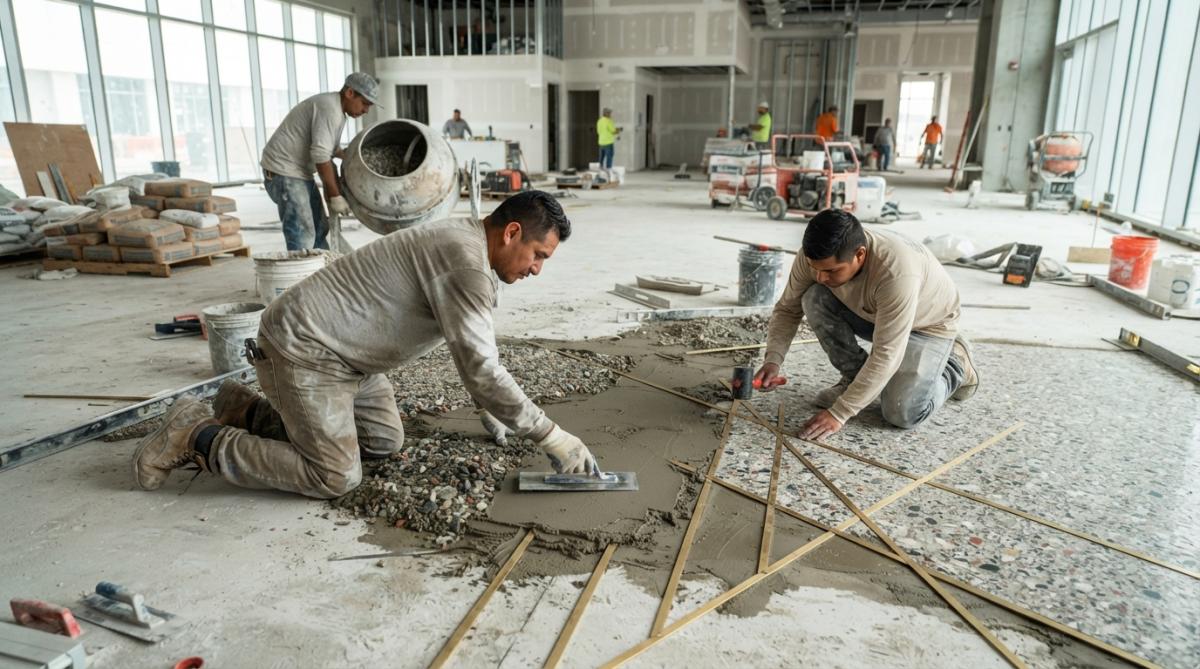
Once the substrate is ready, mixing comes next. Terrazzo consists of epoxy resin or cementitious binder combined with aggregate, typically marble chips, granite, or recycled glass.
For epoxy-based terrazzo, combine the epoxy resin with hardener in exact proportions and mix thoroughly until uniform. Add aggregate in batches while mixing to achieve even distribution without clumping.
Cementitious terrazzo uses cement as the binder instead of epoxy; the mixture is thicker and requires different handling.
Pour the mixed material onto the prepared substrate in sections defined by divider strips, which control cracks and allow for slight movement. Spread the material evenly, working quickly before it sets.
Leveling is critical during the pour. Use screeds and straightedges to achieve target thickness (typically 0.5-0.75 inches). Uneven thickness leads to durability problems and poor appearance. Work in manageable sections of 100-200 square feet depending on material and ambient conditions.
Divider Strip Installation and Leveling
Divider strips create visual patterns, control cracking, and allow for thermal expansion. These metal or plastic strips are installed before pouring the terrazzo.
Plan divider layout before installation. Strips are typically spaced 8-12 feet apart, varying by room size and aesthetic. Install strips flush with the substrate, ensure they're level, and extend slightly above the final terrazzo surface so they can be ground flush later.
Common divider materials include brass (durable, classic look), aluminum (lightweight, cost-effective), and plastic (temporary divisions).
Secure dividers firmly so they don't shift during the pour; movement compromises final appearance and structural integrity. Use mechanical fasteners or adhesive appropriate to your substrate type.
Dividers help control uniform thickness by serving as pouring guides. Fill each section completely and level carefully to prevent high and low spots that create maintenance problems later.
Terrazzo Floor Sealing and Polishing Process
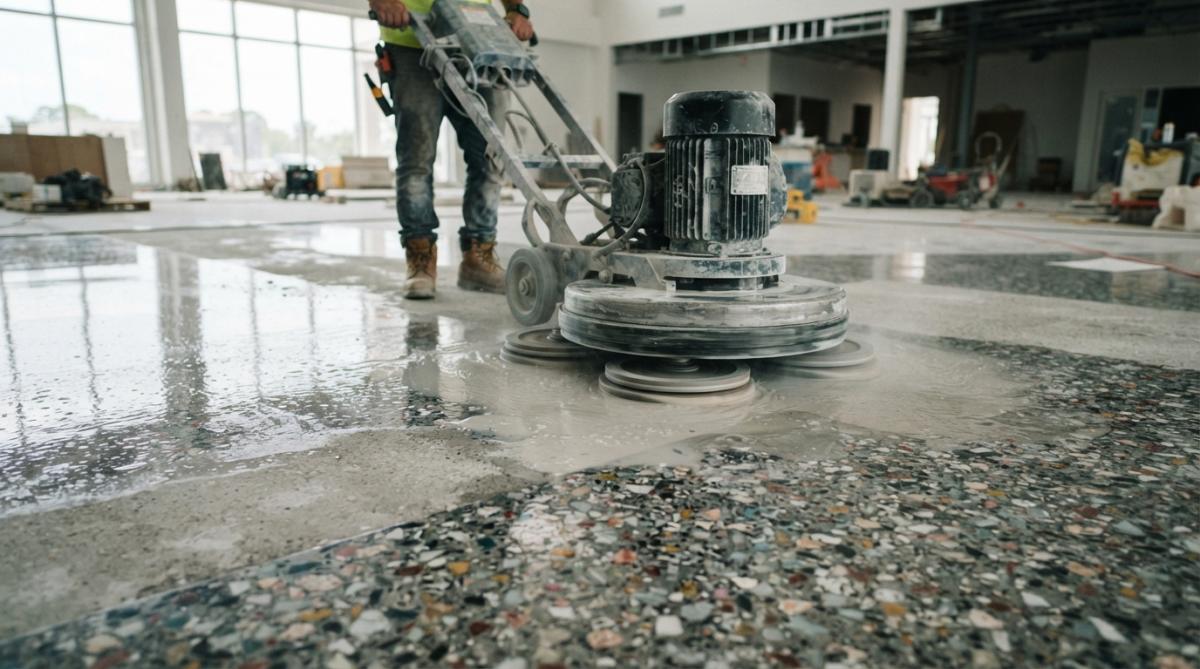
After the terrazzo sets, grinding and polishing reveal the aggregate and create the final finish. In commercial applications, grinding progression, polish level, and sealer type directly impact durability, maintenance burden, slip resistance, and lifecycle cost.
Grinding and Honing Stages
Grinding uses diamond abrasives to remove the top layer of material and expose the aggregate. Start with coarse diamonds (typically 40-60 grit) and progress through medium grits (120-220) to finer grits (400-600). Each pass smooths the surface and prepares it for the next stage. This process removes any imperfections, high spots, and surface blemishes created during the pour. The depth of grinding depends on the terrazzo thickness and desired aggregate exposure; commercial floors typically require 0.125 to 0.25 inches of grinding to fully reveal the marble or glass chips.
Honing follows grinding, using finer diamonds (800-1200 grit) to create a smooth, uniform surface and reduce porosity slightly, preparing the surface for sealer penetration.
Polishing is the final mechanical step, using ultra-fine diamonds (1500-3000 grit) to create a glossy finish. Higher polish creates a mirror-like finish but reduces traction; lower polish (800-1200 grit) maintains better slip resistance, critical in healthcare facilities, airports, and high-liability spaces. The Coefficient of Dynamic Friction (DCOF) must meet ASTM F1679 standards; most commercial applications require a minimum DCOF of 0.42 for wet conditions. Work with your installer to choose the right finish for your space and document this decision in your project specifications.
Sealing: Chemistry and Performance
After polishing, the floor must be sealed. Sealing is not optional; unsealed terrazzo stains easily, absorbs moisture, and deteriorates faster. Sealers come in two primary formulations, each with distinct performance profiles:
Penetrating Sealers (typically siloxane or silane-based) absorb into the terrazzo surface and harden the top layers. They preserve natural appearance and slip resistance, making them ideal for high-traffic areas. They require reapplication every 2-5 years and cost $0.50-$1.50 per square foot for material, but maintenance is more frequent.
Membrane Sealers (typically polyurethane or acrylic-based) form a protective layer on top of the terrazzo, enhancing color and gloss and lasting 5-10 years between reapplications. However, they reduce slip resistance and can yellow under UV exposure. They cost $1.50-$3.00+ per square foot but reduce maintenance frequency. They are less suitable for outdoor or high-moisture commercial spaces.
For commercial facilities, penetrating sealers are often preferred because they maintain slip resistance and the natural aesthetic of terrazzo while still providing adequate protection. Healthcare facilities, airports, and educational institutions typically specify penetrating sealers to meet ADA slip-resistance requirements.
Application and Curing
Apply sealer evenly using a mop, sprayer, or roller. Multiple thin coats provide better protection than a single heavy coat. Curing times vary: penetrating sealers typically cure in 24-48 hours, while membrane sealers may require 5-7 days before heavy use. Temperature and humidity affect curing speed.
Document the sealer type, application date, and reapplication schedule in your facility maintenance plan. This record ensures consistent care and helps predict future maintenance costs. A well-sealed terrazzo floor in a commercial setting typically requires resealing every 3-5 years, depending on traffic intensity and cleaning protocols.
Terrazzo Flooring Installation Timeline and Curing
Timing is critical in terrazzo installation; rushing the process compromises durability.
Most commercial installations take 2-4 weeks from substrate preparation to final completion. Epoxy-based systems typically cure faster than cementitious systems.
Here's the general sequence:
- Substrate preparation: 2-5 days
- Divider installation: 1-2 days
- Pouring and leveling: 1-3 days (depending on total area)
- Initial curing: 3-7 days before grinding begins
- Grinding and polishing: 3-7 days
- Sealing: 1-2 days
- Final curing: 5-14 days before full use
Curing time is critical. The terrazzo must fully harden before grinding begins. Grinding too early damages the material. After sealing, allow adequate curing before allowing heavy foot traffic or equipment on the floor.
Temperature and humidity affect curing speed. Cooler, drier conditions slow curing. Warm, humid conditions speed it up. Your installer should monitor conditions and adjust timelines accordingly. Protect the floor from moisture, traffic, and temperature extremes during curing.
Safety, Compliance, and Troubleshooting
Commercial terrazzo installation must meet federal safety regulations, building codes, and performance standards. Compliance is not optional and directly affects liability, warranty validity, and long-term floor performance.
OSHA Safety Requirements During Installation
OSHA regulations govern worker safety during terrazzo installation. Key requirements include:
Ventilation and Respiratory Protection: Epoxy-based terrazzo systems release volatile organic compounds (VOCs) during mixing and application. OSHA requires adequate natural or mechanical ventilation maintaining appropriate air changes per hour (ACH). Workers must use supplied-air respirators or NIOSH-approved cartridge respirators when epoxy VOC concentrations exceed permissible exposure limits (PELs). Cementitious terrazzo systems have lower VOC emissions but still require dust control during grinding.
Building Code and Performance Standards
Slip Resistance (ASTM F1679): Commercial terrazzo must meet minimum Coefficient of Dynamic Friction (DCOF) standards based on occupancy type. Most jurisdictions require a minimum DCOF of 0.42 for wet conditions; healthcare facilities, airports, and educational institutions often require 0.50 or higher. Your installer should measure DCOF using standardized testing equipment before final acceptance and document this measurement in your project closeout.
Common Installation Failures and Prevention
Post-Installation Verification and Documentation
Frequently Asked Questions
What are the main steps in the commercial terrazzo installation process?
The terrazzo installation process involves substrate cleaning and moisture testing, mixing the cementitious binder with aggregate and marble chips, pouring the material over prepared concrete slabs, installing divider strips, grinding and polishing with diamond abrasives, grouting pinholes, sealing, and curing. Each step requires precision to ensure uniform thickness, proper bonding, and a durable aesthetic finish that meets commercial durability standards.
How long does the terrazzo flooring installation timeline typically take?
Commercial terrazzo installation usually takes 2-4 weeks from start to finish, depending on floor size and complexity. Substrate preparation takes 3-5 days, pouring and initial curing 7-10 days, grinding and polishing 3-5 days, and final sealing 2-3 days. Full curing before heavy foot traffic requires 28 days. Larger projects or those requiring custom patterns may extend this timeline.
Why is substrate preparation for terrazzo flooring so critical?
Substrate preparation determines whether your terrazzo floor will last decades or fail within months. The concrete slab must be cleaned, moisture-tested (below 3 lbs/1000 sq ft per 24 hours), and shot-blasted to ensure proper bonding with the cementitious binder. Poor substrate prep causes cracking, delamination, and early failure. This step directly impacts the structural integrity and longevity of your installation.
What maintenance is required immediately after terrazzo installation?
After installation, avoid foot traffic for 28 days while the cementitious binder fully cures. Once cured, use pH-neutral cleaners only, acidic or alkaline products damage the sealer and porosity. Dust mop daily and damp mop weekly. Reapply sealer every 1-3 years depending on traffic. Proper post-installation care prevents premature wear and maintains the slip resistance and aesthetic finish.